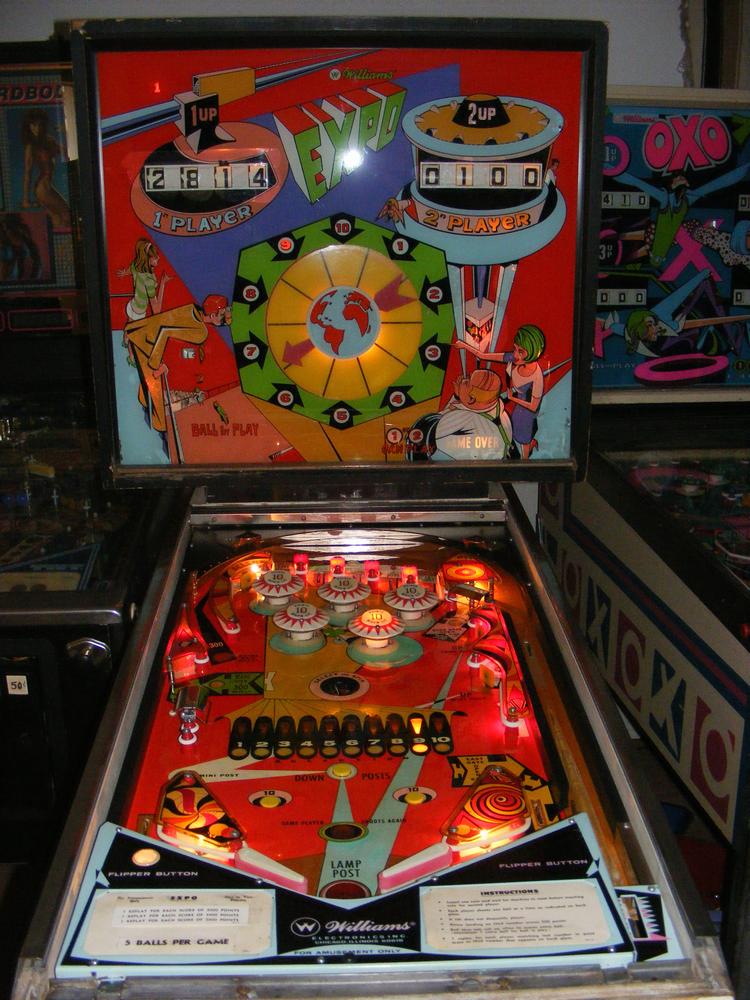
My First Full Pinball Restoration:
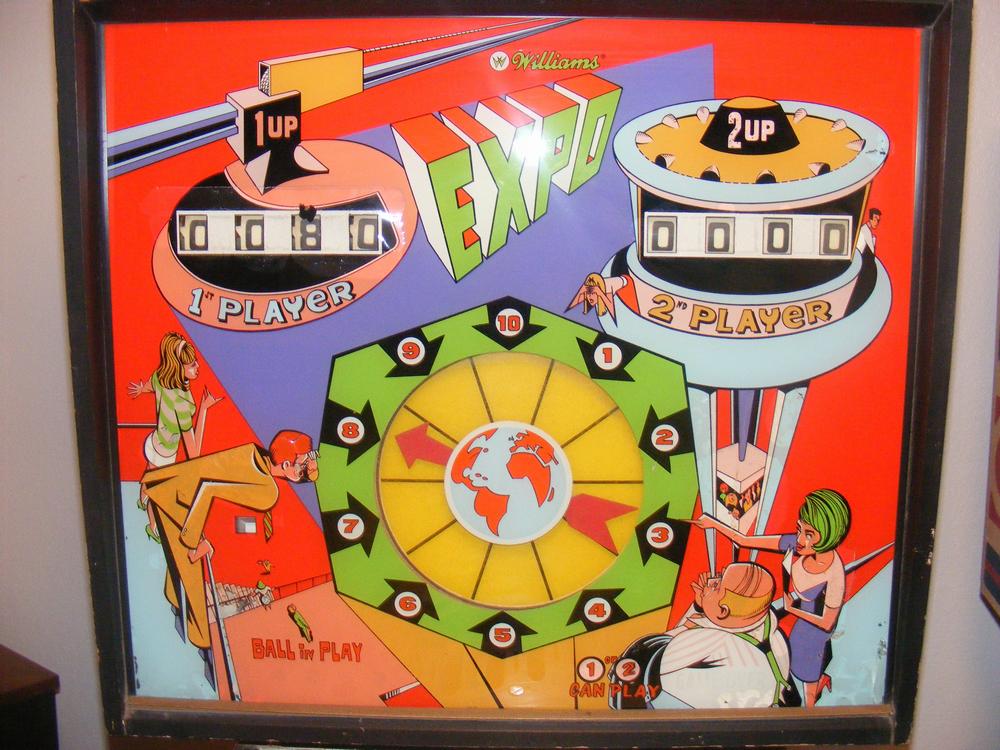
Williams 1969 Expo
Takeaway
Plus a sneek peek of Expo in action after the restoration process
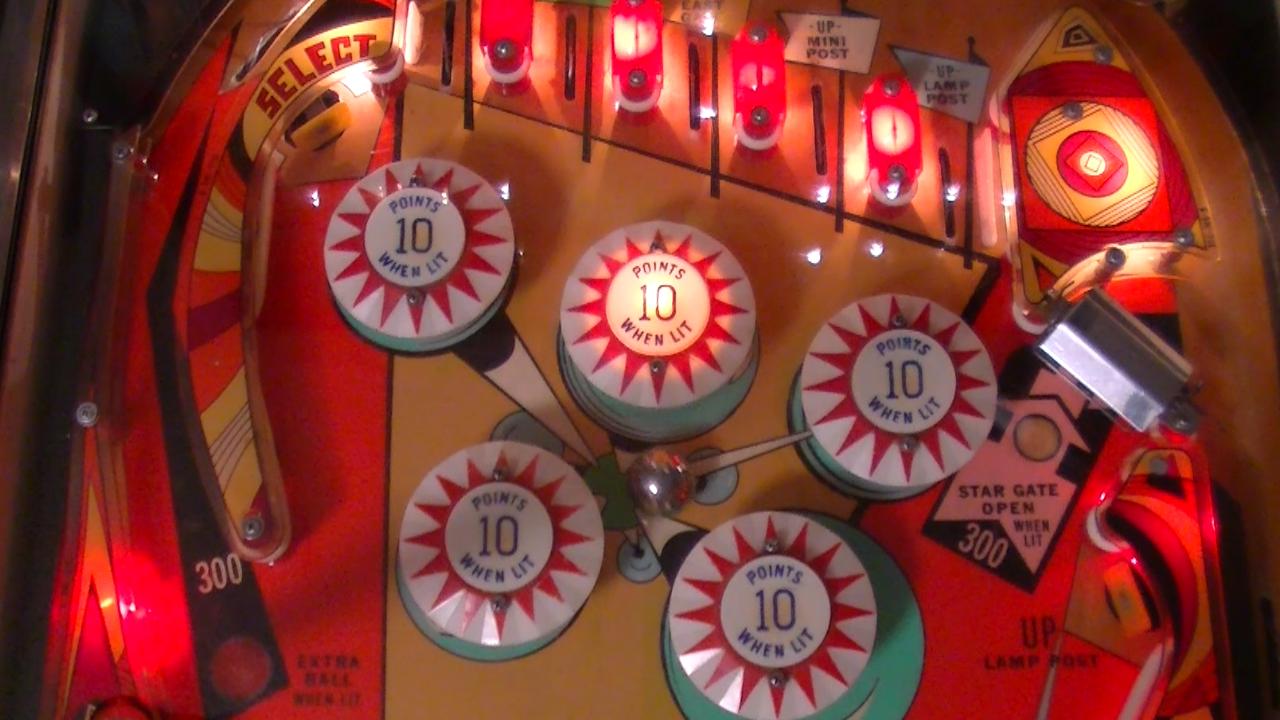
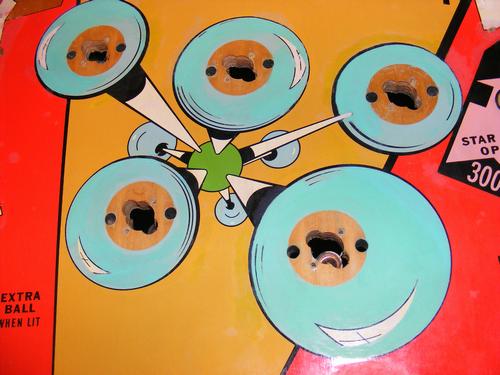
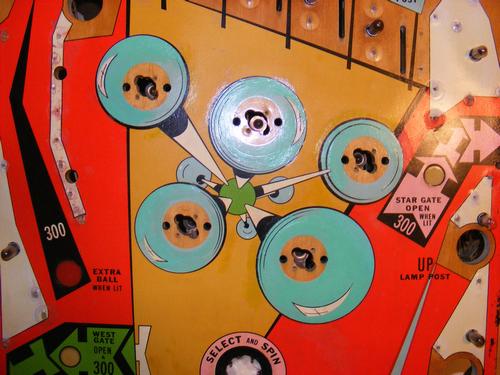
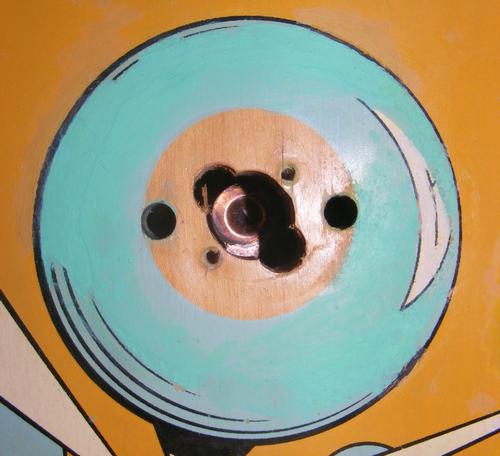
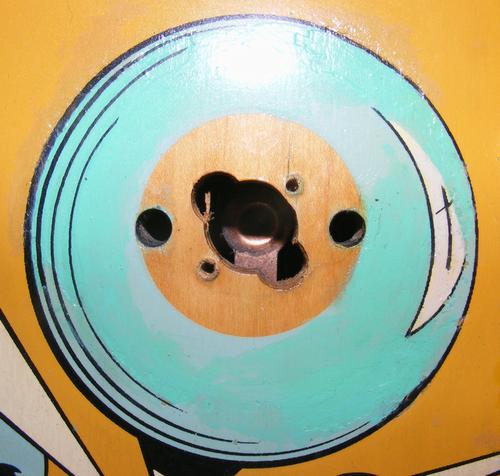
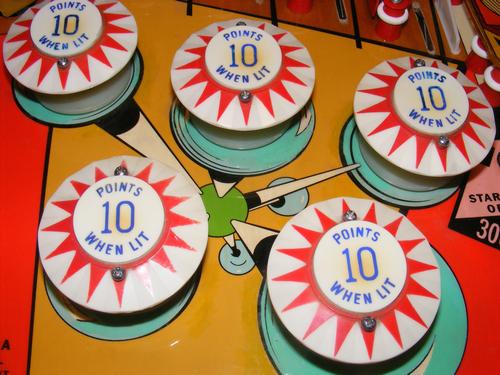
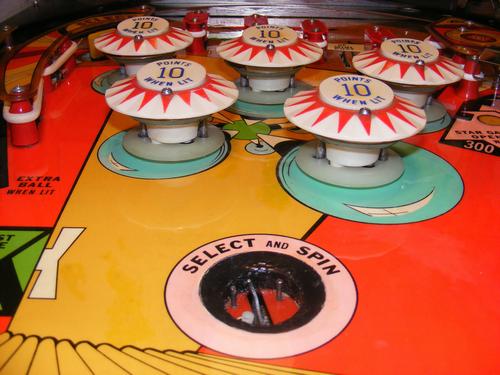
I always enjoyed playing this game but it was slow and the pop bumpers would barely send the ball off in another direction. During the restoration process I wanted to pay extra special attention to the pop bumpers, all five of them. They were completely disassembled and cleaned. New nylon coil sleeves were purchased to replace the old aluminum sleeves.
The result was amazing! This is how the machine must have played back in the early '70s - and I didn't need to replace any other parts to put real "POP" back into the pop bumpers. You be the judge, but I think that after the restore Expo plays every bit as good as it looks! Who says these EMs can't be fast and fun?
Take a sneek peek of video showing the fully restored 1969 Williams Expo in action.
By Alan Norton
Tucson, Arizona
July 5th, 2015
Playfield Before Shots
Back Box Before Shots
Inside Cabinet
The First Battle - Removing Vinyl Pop Bumper Protectors
The Second Battle - Removing the 46 Years of Grunge
The Third Battle - Cleaning the Plastics
The Fourth Battle - Playfield Cleaning With Melamine Foam
The Fifth Battle - More Cleaning!
The Sixth Battle - Mech Board Sanding, Mech Removal, Painting, Mech Replacement
The Seventh Battle - Add Dowel Pins for Stripped Playfield Holes
The Eighth and Most Painful Battle - Playfield Paint Touch-up
Finished Paint Touch-up Pics
The Ninth Battle - Leveling Playfield Inserts.
The Tenth Battle - Applying First Clear Coat
The Eleventh Battle - Applying Water Slide Decals for Key Lines and Black Lines in Circles
The Twelfth Battle - Applying Fourth and Final Clear Coat
The Thirteenth Battle - Applying Mylar
The Fourteenth Battle - D-Day, Zero Hour
The Fifteenth Battle - Fixing the Electrical and Mechanical Components
Before and After Pics
After Close-Up Pics
Pinball Restoration Resources
It's funny how you one day find yourself neck-deep in a big project after years of neglect. I had owned three Williams pinball machines in the late '80s that I sold to a friend. Two of those returned home a few years ago, Expo, 1969 and OXO, 1973. OXO was in need of some relay switch adjustments and a new flipper shoe and shaft assembly. I made the fixes and took one of Expo's flippers to get OXO up and running.
One look at Williams Expo though and I knew I had a huge project to bring it back to some semblance of life. Some of the pinball restoration threads on Pinside.com made me realize how far from "restored" this machine really was. Worse yet, they gave me the courage to tackle a "complete restoration", something that I had never done before. This forum topic Vid's Guide to Ultimate Playfield Restoration was particularly helpful planning my plan of attack. First off, let me say that the host, vid1900, is in a completely different galaxy than I am when it comes to how to restore a pinball. I bow to his experience, light years beyond mine, and might have followed his instructions to the letter were it not for the budget I had to live to. Even if I had the money, I didn't want to clear the 1969 Electromagnetic Machine (EM) with two part automotive clear coat that would make the machine "bling", atypical of the period.
I also decided to spot touch-up the damaged paint instead of the more thorough repaint method as described by vid1900. I knew this would be the hardest part of the project, especially with only my eighth grade color mixing as experience to guide me.
My battle plan was as follows:
- Clear enough of playfield to clean off grunge, grit and grime.
- Use melamine Foam (MF - Mr. Clean, Magic Eraser; Walmart, Great Value Miracle Cleaning Erasers) to remove the ball swirls. Expo was a poster child for ball swirls. There were so many that they literally darkened the playfield, dulling the vibrant colors lying below.
- Use 91% isopropyl alcohol to remove the MF.
- Remove mech board and clean parts!
- Paint and touch-up the playfield with acrylic paint.
- Remove remaining parts sticking above playfield.
- Clean parts!
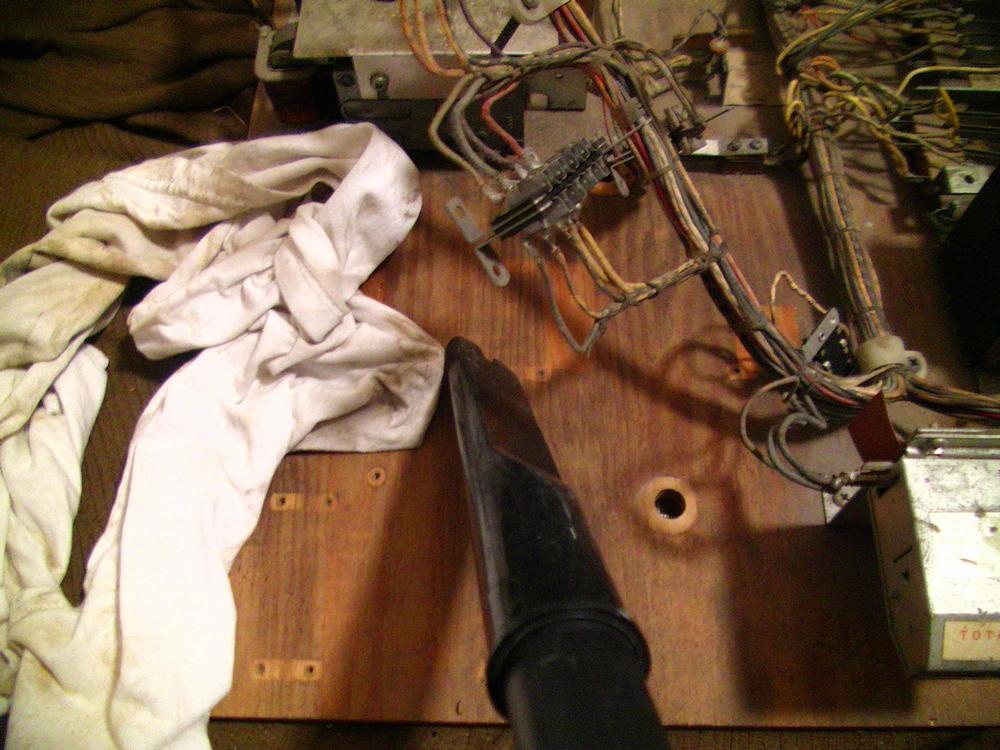
- Thoroughly clean multiple times entire playfield with VMP Naphtha.
- Thoroughly clean entire playfield with a vacuum cleaner nozzle.
- Nothing, including fingers should now touch the playfield!
- Lay down a thing coat of Krylon Acrylic Lacquer on the entire playfield locking in all of you hard art work.
- Print and set waterslide laser printer decals for damaged key lines and partial black circle art near the pop bumpers.
- Add two more coats of acrylic lacquer, waiting until the first coat is thoroughly dry before adding the second.
- Optional - add Mylar to full or partial areas of the playfield.
- Add a new pinball - dirty, pitted or even rusty pinballs are abrasive and hard on the playfield, replace them!
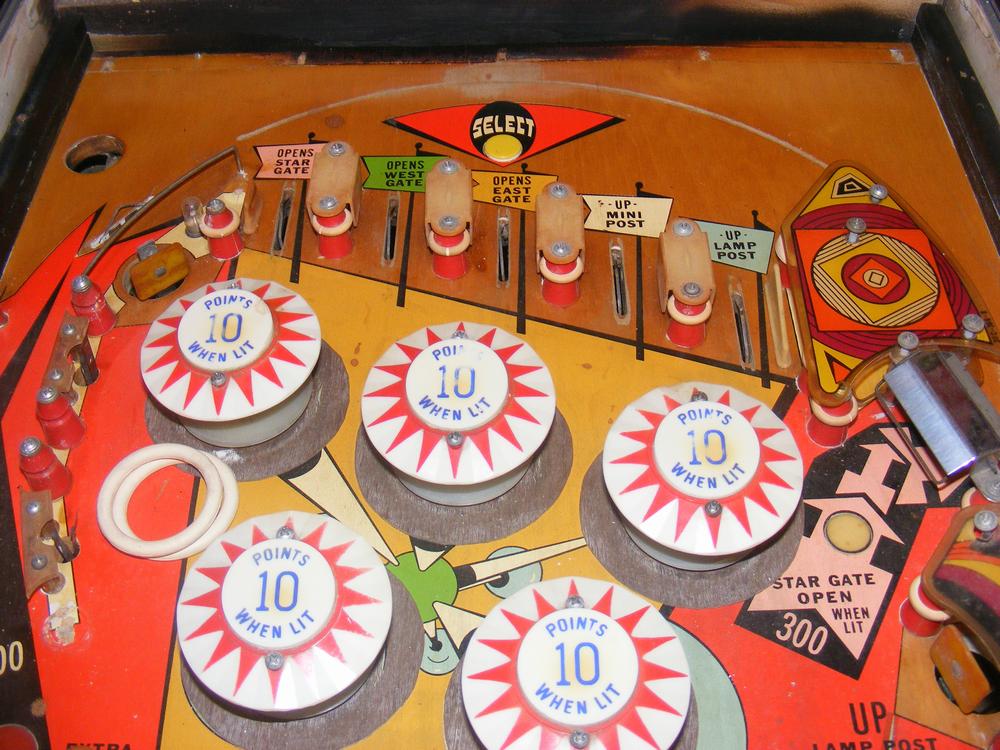
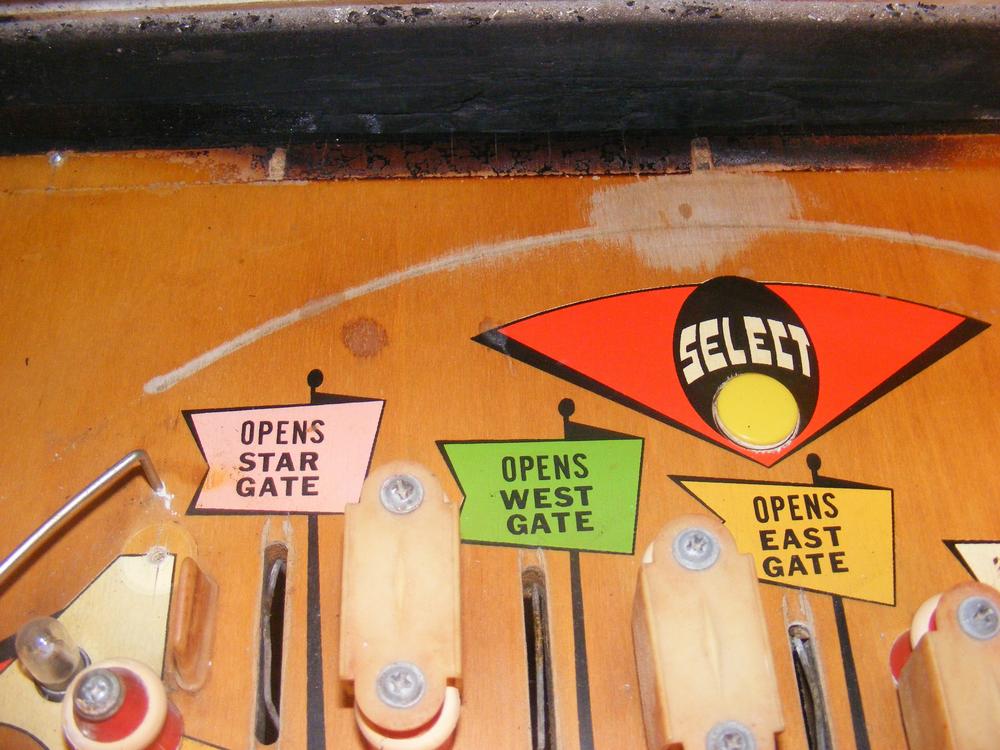
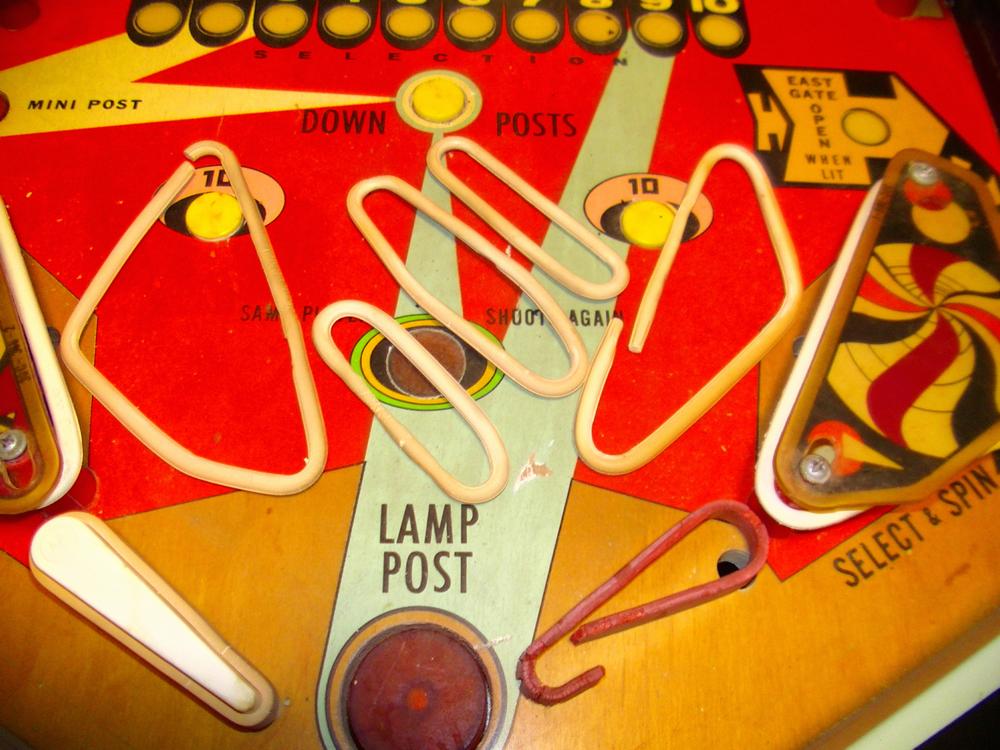
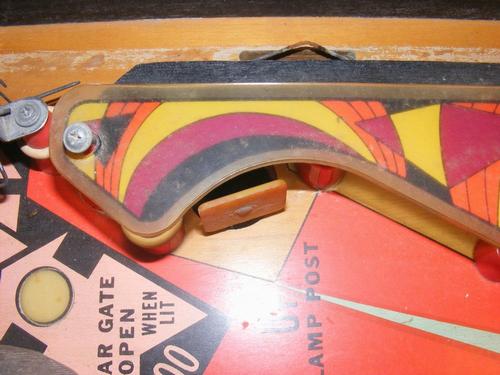
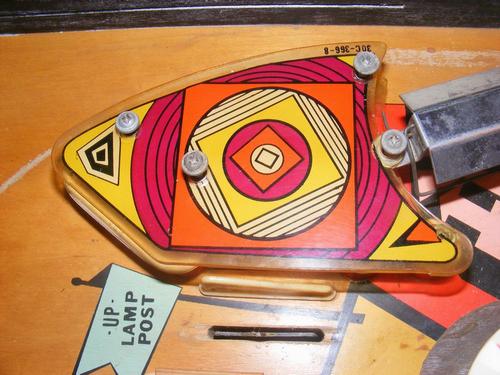
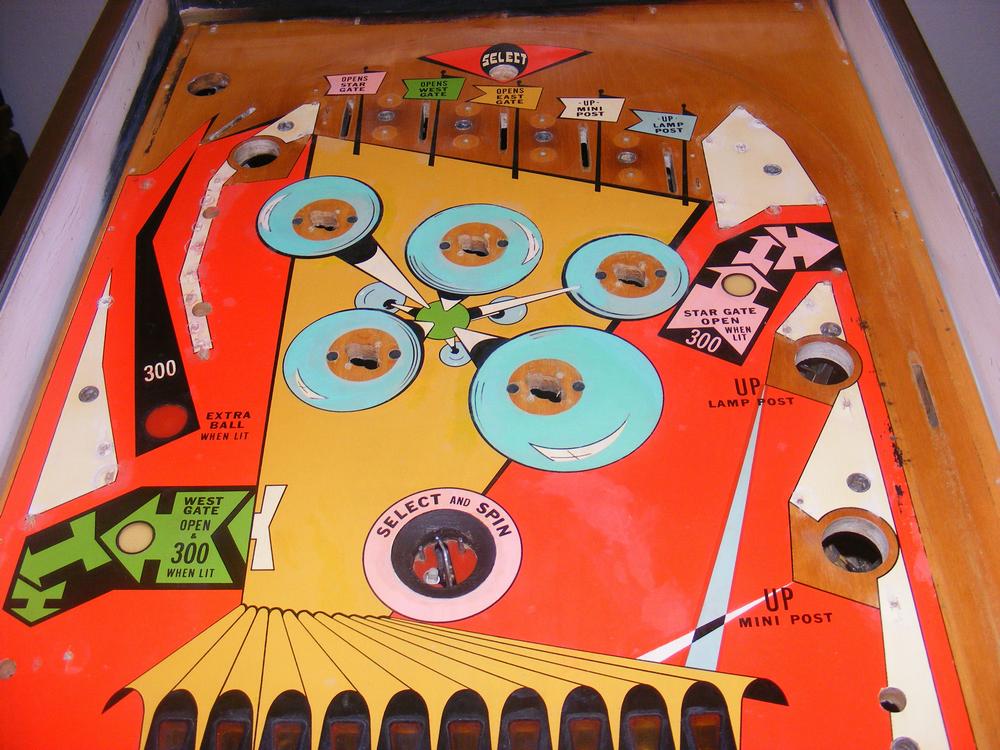
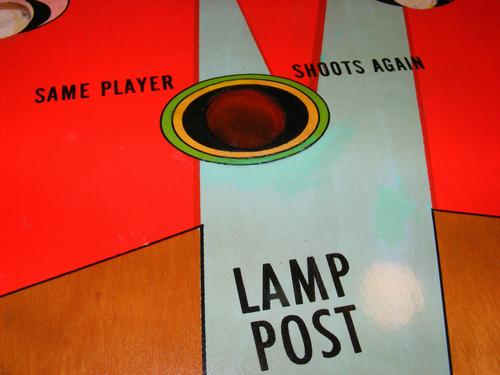
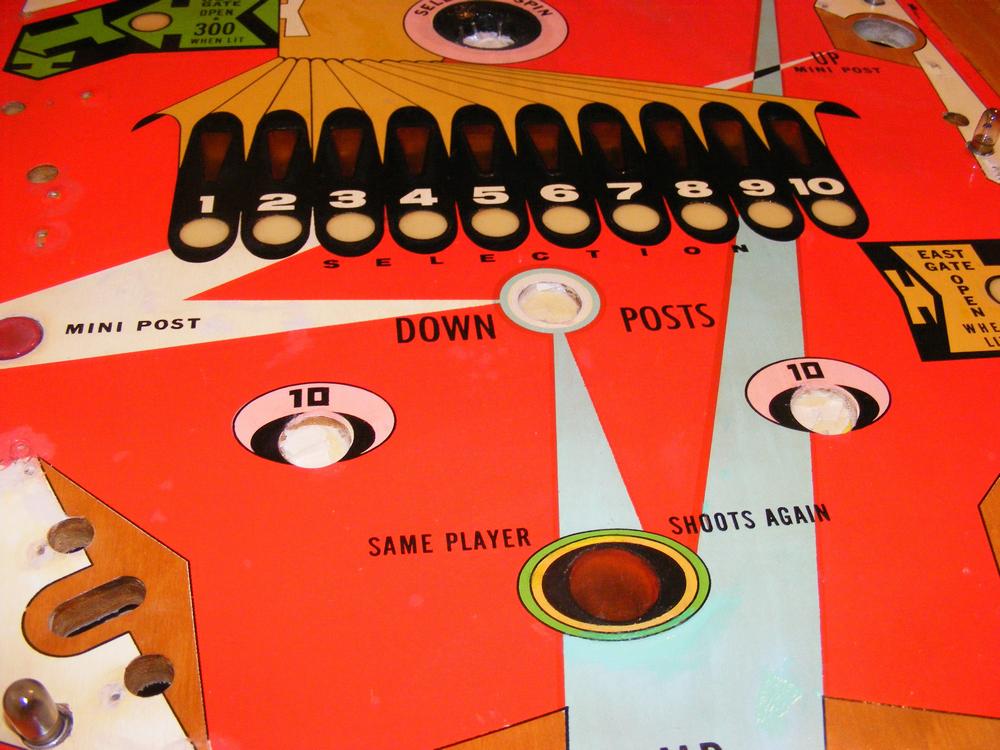
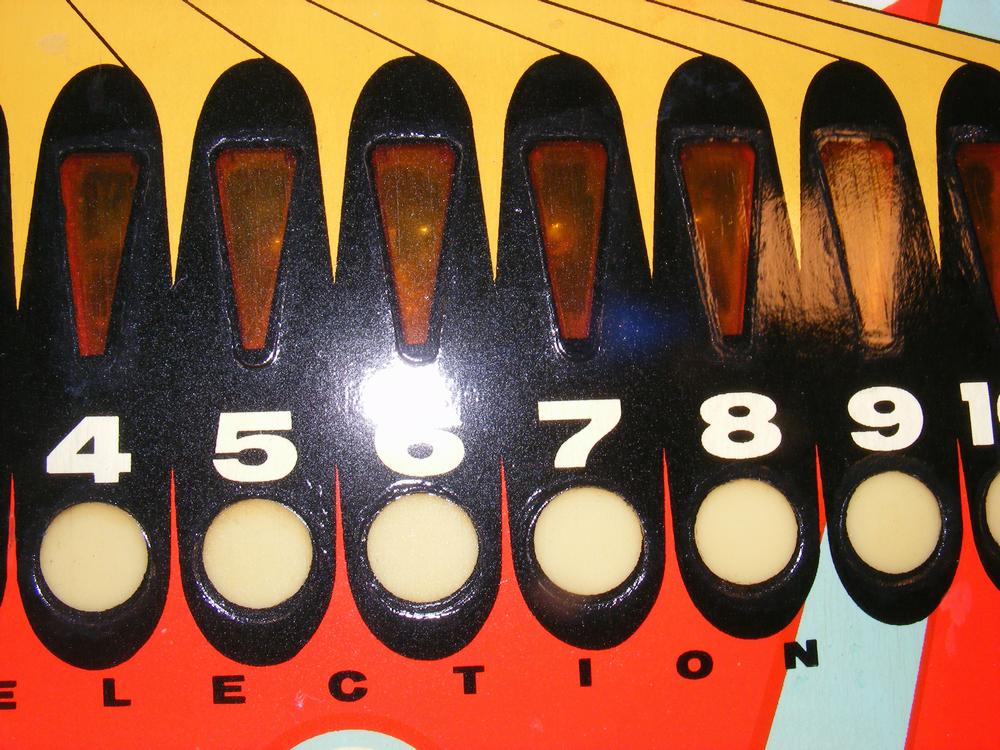
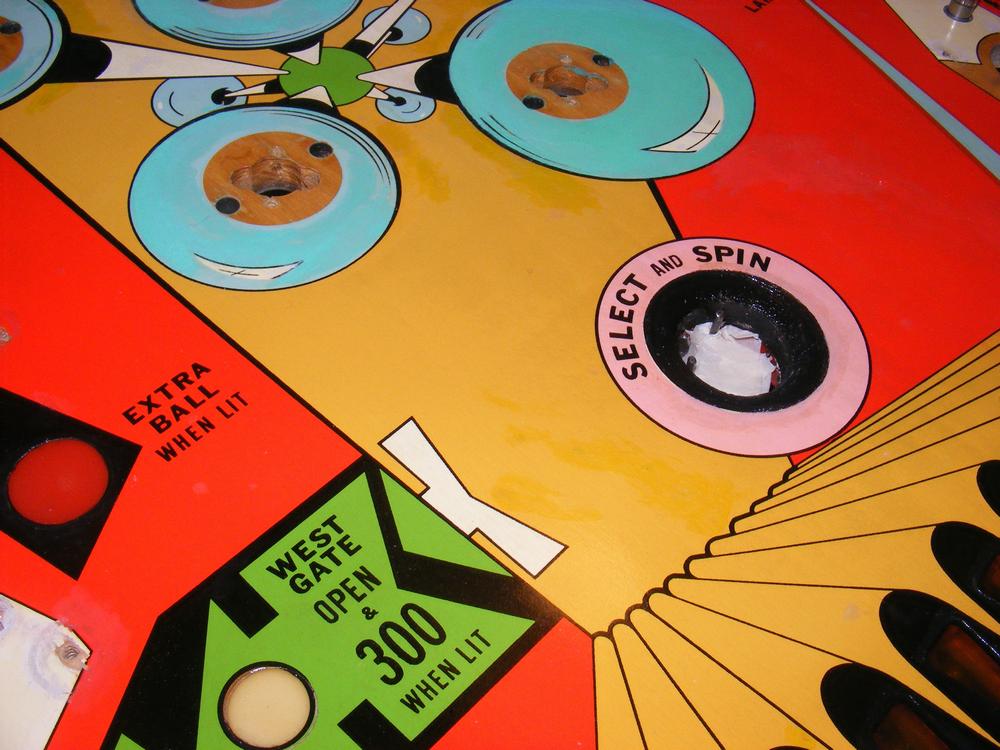
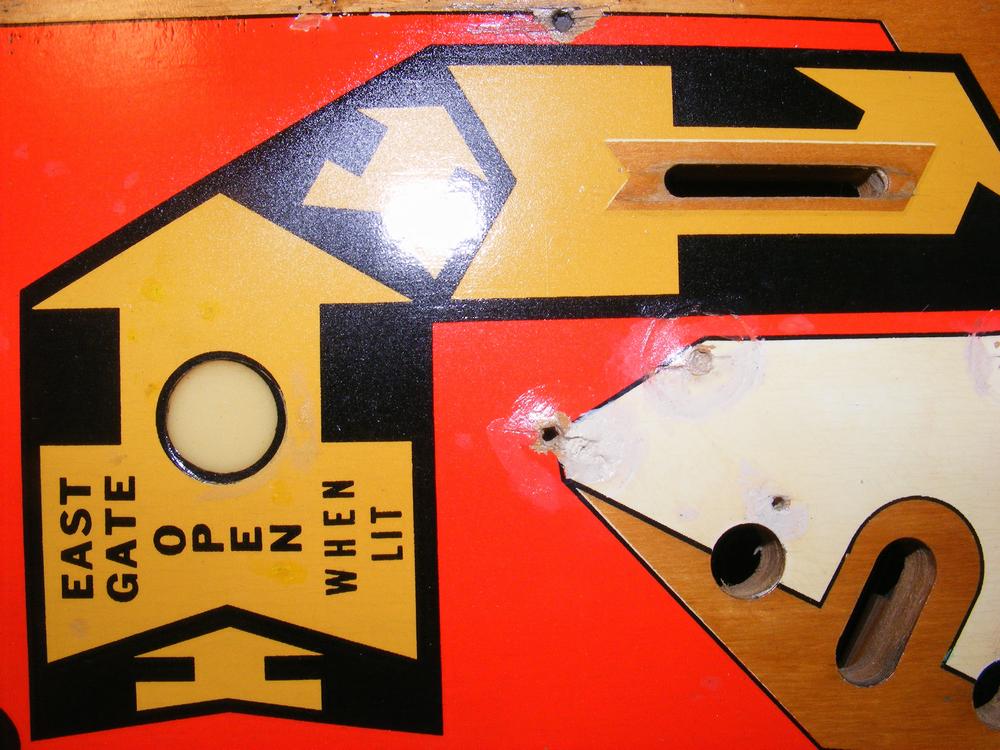
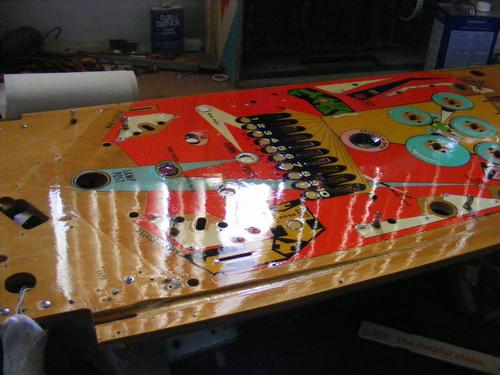
Playfield Before Shots
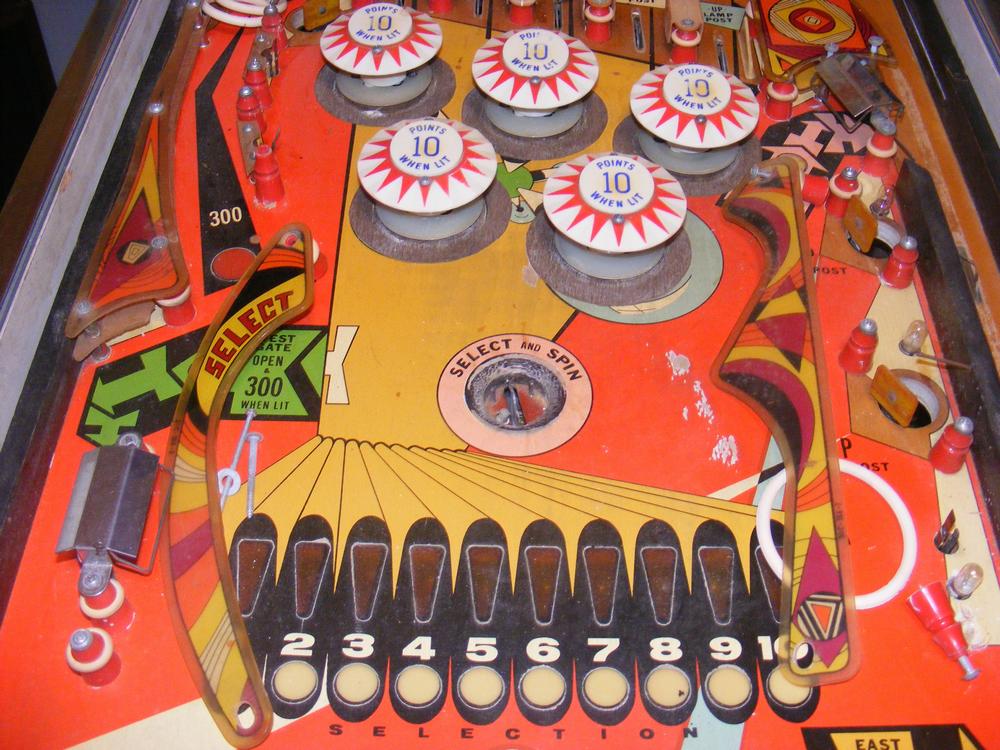
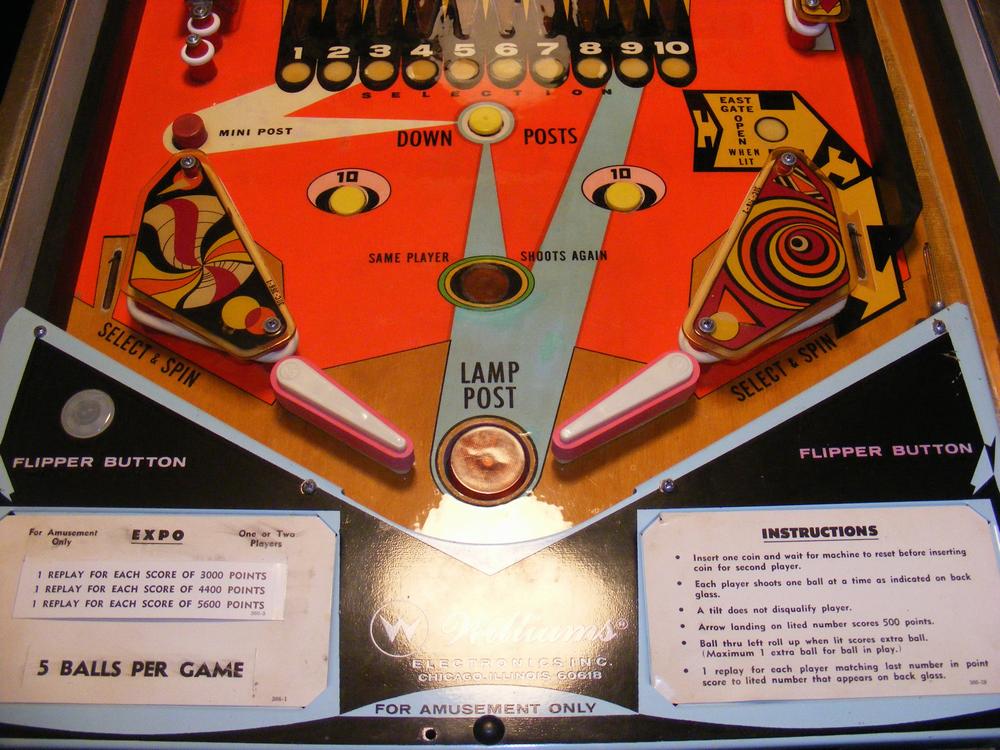
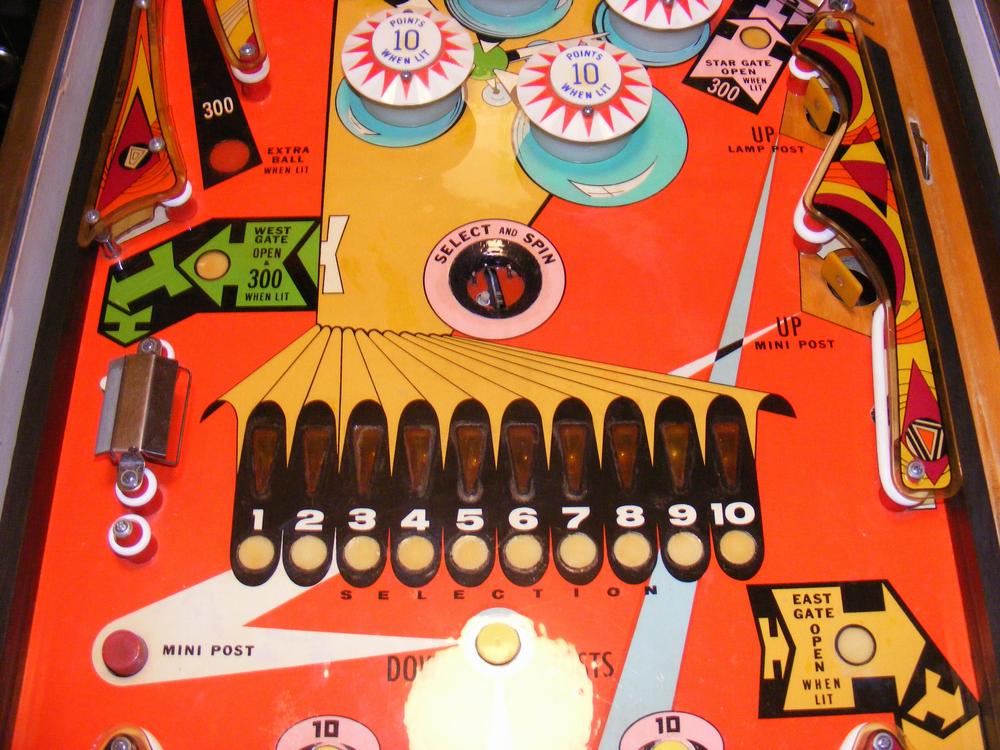
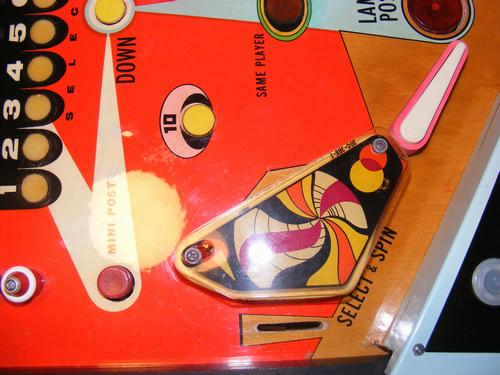
The playfield had some wear down to the wood in a number of spots and lots of typical missing paint around the inserts, thankfully black, as that is the easiest color to touch up.
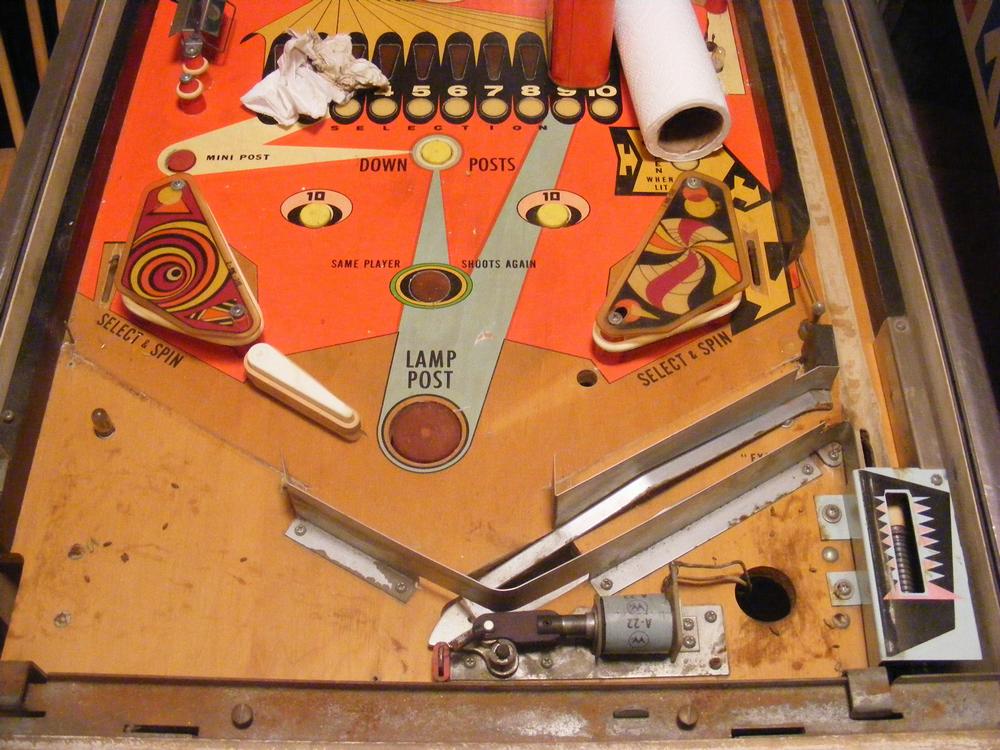
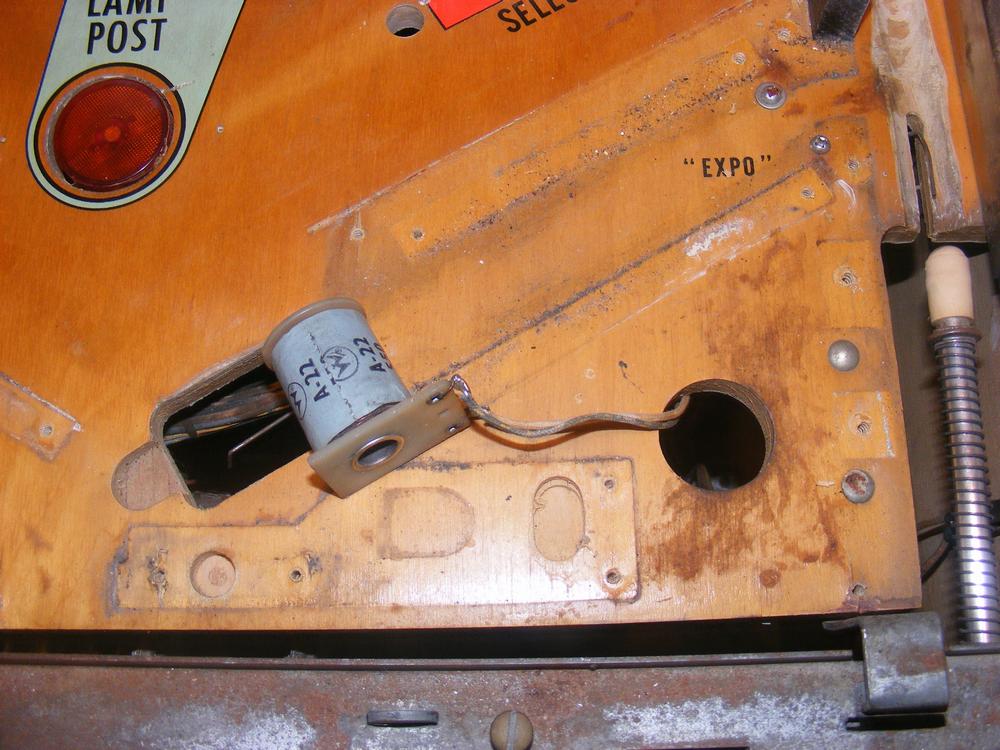
Also typical, the upper playfield had a groove where the ball moved against the upper apron. What wasn't so typical was damage from a fire inside the machine. Fortunately, most of the damage was hidden under the upper apron metal pieces.
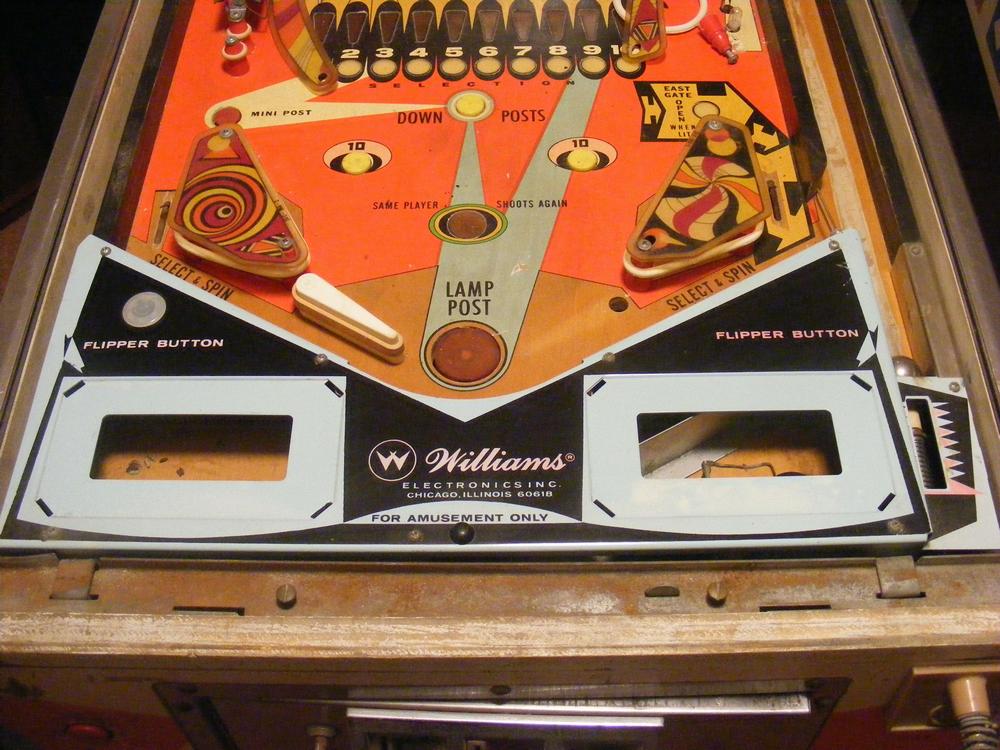
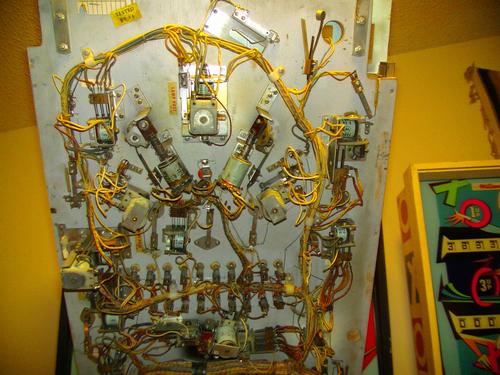
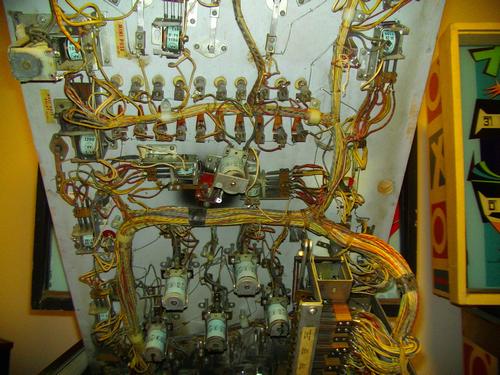
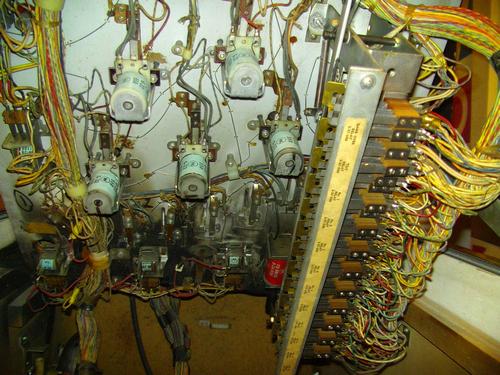
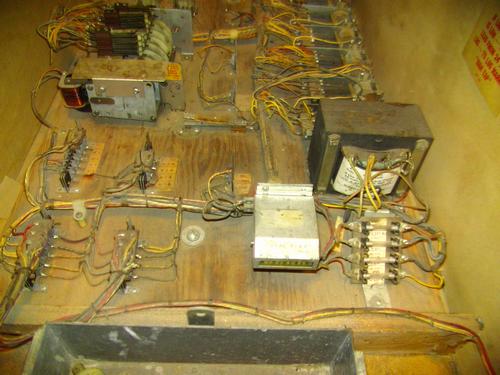
Back Box Before Shots
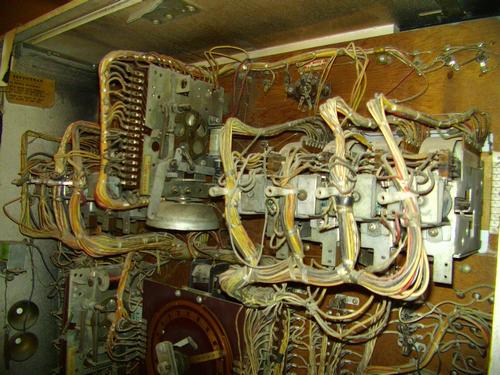
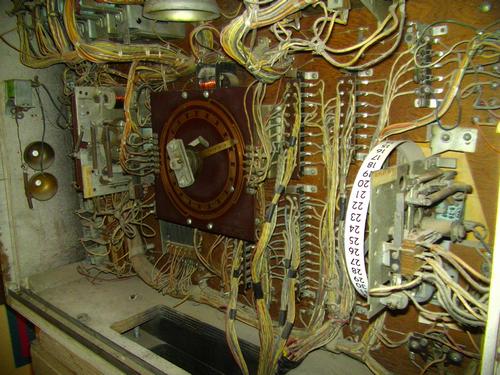
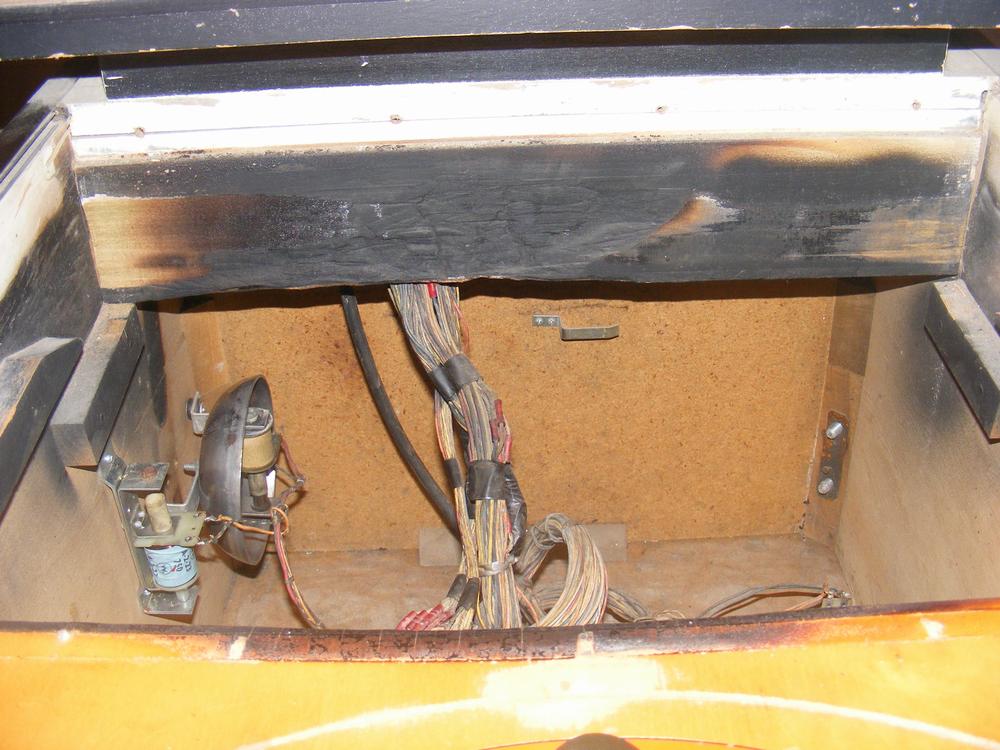
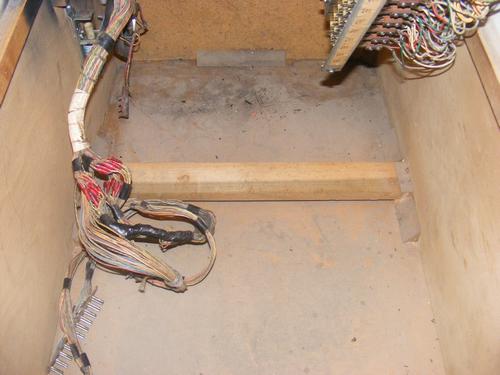
Inside Cabinet

What do 25+ year-old rubber rings look like when removed from a pinball machine?
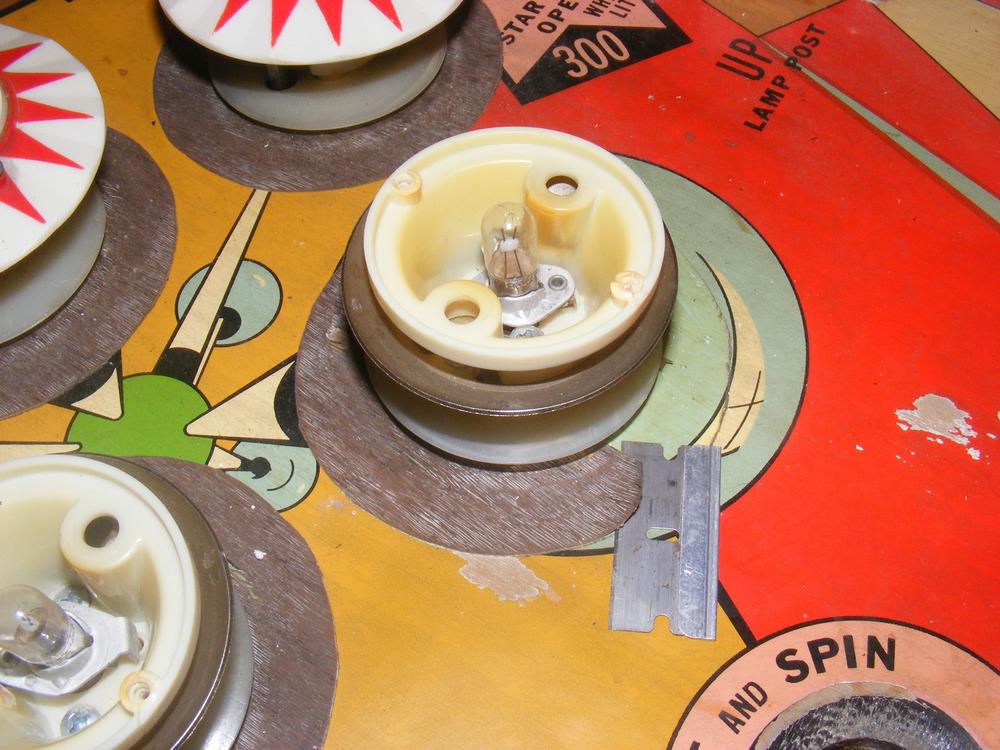
The First Battle - Removing Vinyl Pop Bumper Protectors
The Second Battle - Removing the 46 Years of Grunge
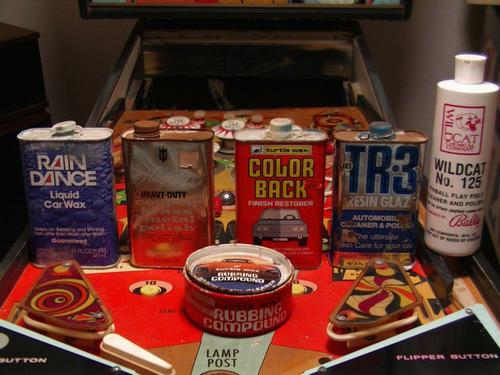
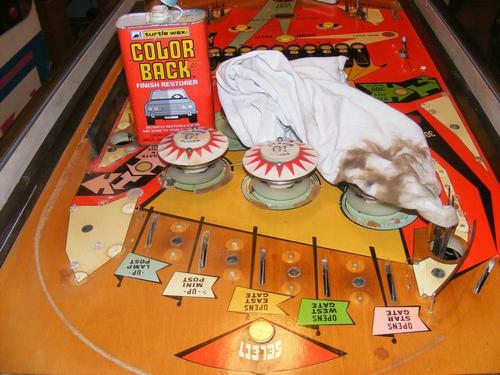
Pitiful Pinball WOW (Words of Wisdom) #1: Always test anything you want to put on a playfield in an inconspicuous place before going Whole-hog in! The Turtle Wax Color Back did a decent job of removing 46 years of yellowed dirt and wax - with a little elbow grease of course. Little did I know at this point that I would be touching every square inch of the playfield numerous times.
The Third Battle - Cleaning the Plastics
The plastics were covered with 25 years of grunge. Windex was used to clean them.
The Fourth Battle - Playfield Cleaning With Melamine Foam
I used 91% alcohol and Walmart's brand foam with a little light pressure. I was constantly checking to be sure I wasn't removing any playfield ink.
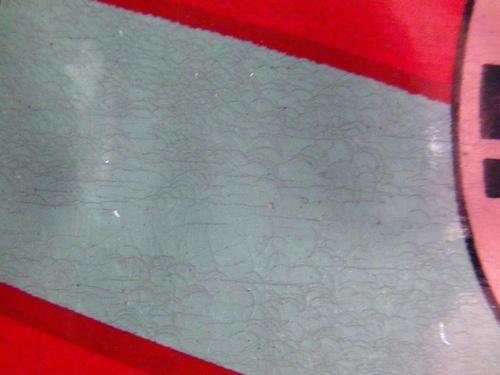
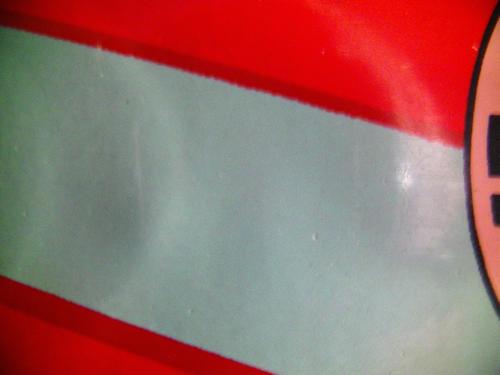
Pitiful Pinball WOW (Words of Wisdom) #3: Melamine Foam is abrasive! Use carefully with light pressure to avoid playfield ink/paint removal! Use a white rag and check it often for any playfield ink.
The Fifth Battle - More Cleaning!
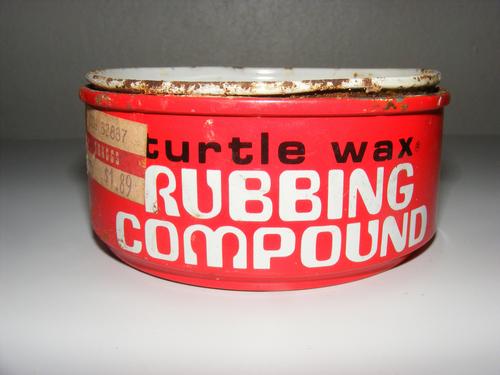
A pinball machine this old will have surface rust, dried lubricant, dust, feces, nicotine, metal dust and your basic sticky grunge. Take out the playfield touch-up and 80% of your time will be spent cleaning if you are doing a thorough restore. I cleaned everything - relays, solenoids, switches, plastics, metal wire rollovers, posts, aprons, buttons, well you get the idea. What you use to clean these parts is critical to a clean machine without damaging the parts! You need to be especially careful cleaning playfield plastics and pop bumper top plastics. Ink can come off these parts. I used diluted Windex on these parts, being careful not to remove the ink on the pop bumper caps. Almost all metal parts were cleaned with Turtle Wax rubbing compound. This stuff is fantastic. It removes surface rust and gunk and polishes at the same time. Finish with a clean rag or paper towels to remove all of the rubbing compound. It is abrasive and you don't want to leave any behind. If you don't have a tumbler, you can clean the screw heads with the same cleaners. Put some rubbing compound on a rag and wet the area with Windex. Put the rag down on a piece of cardboard and buff the screw heads by moving them over the rubbing compound. Even the dirtiest screws can shine using this method. Be sure to remove all rubbing compound before using the screws.
The Sixth Battle - Mech Board Sanding, Mech Removal, Painting, Mech Replacement
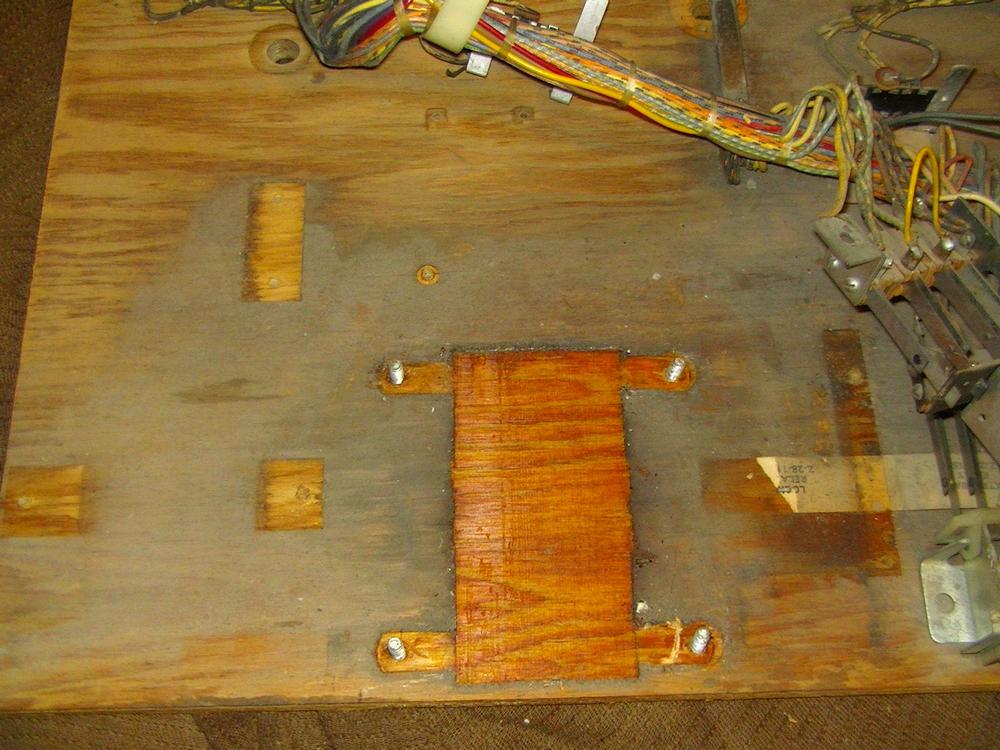
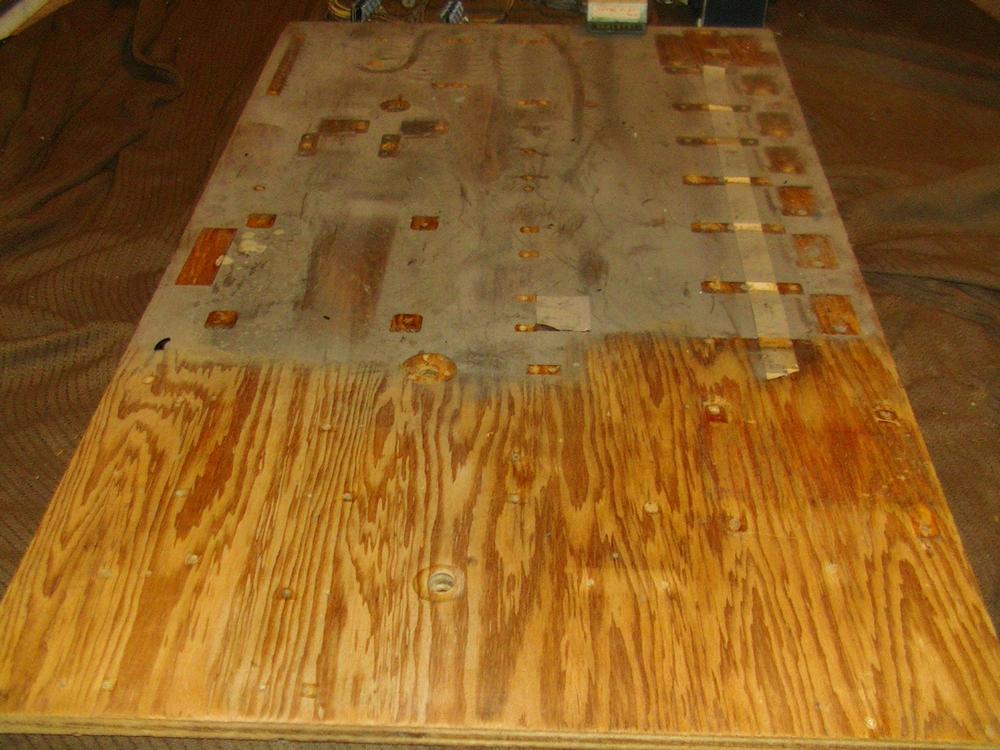
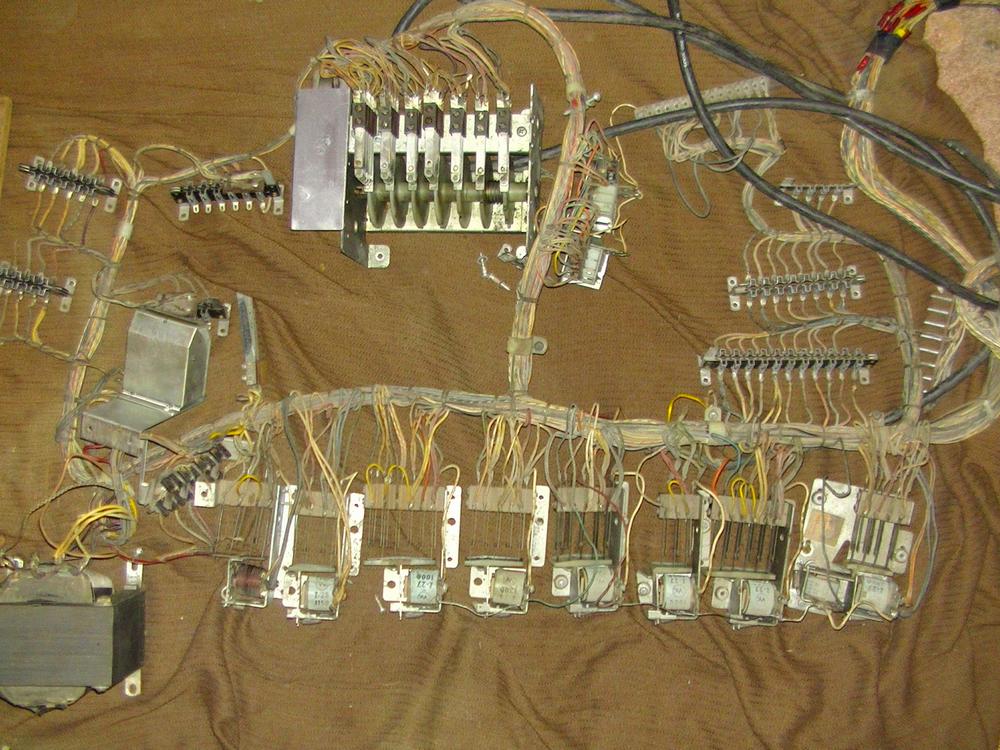
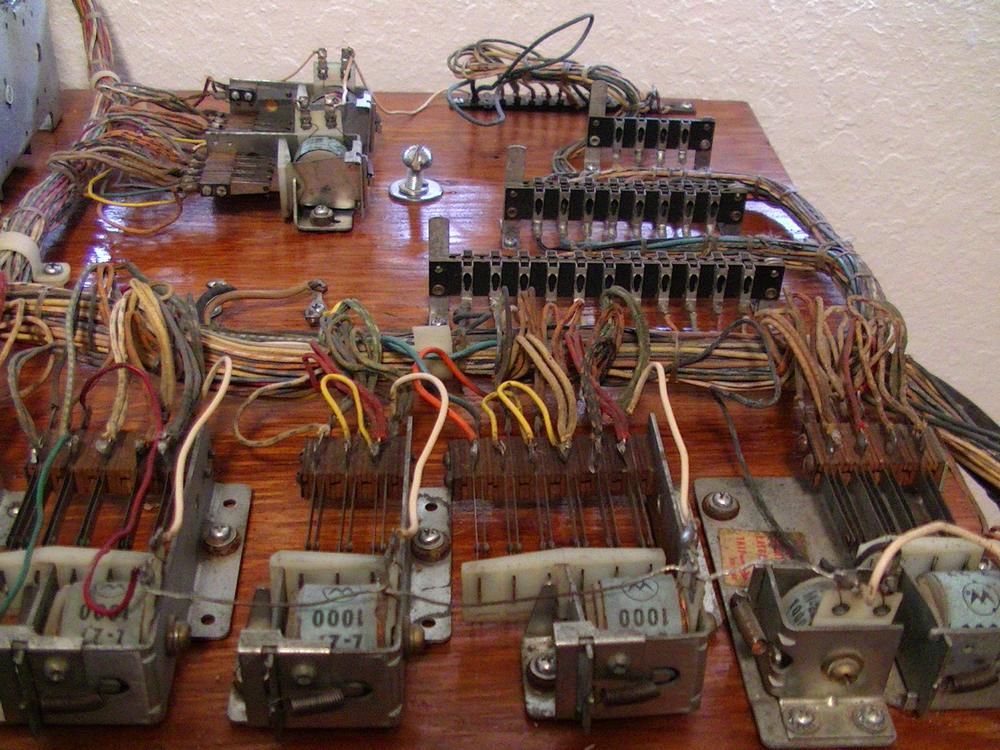
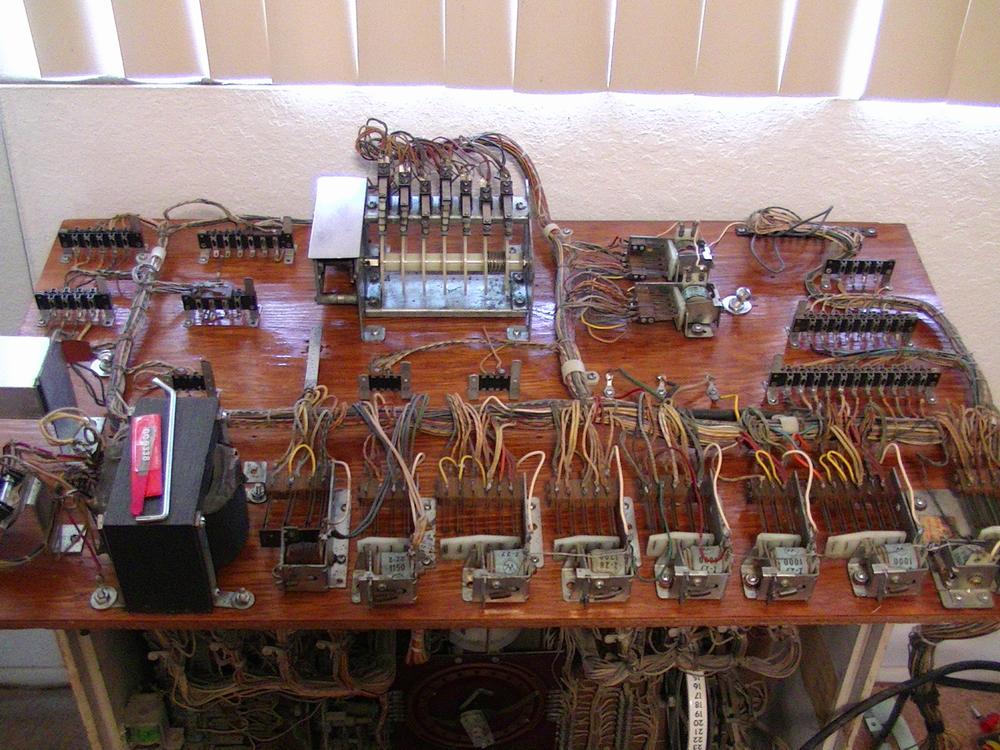
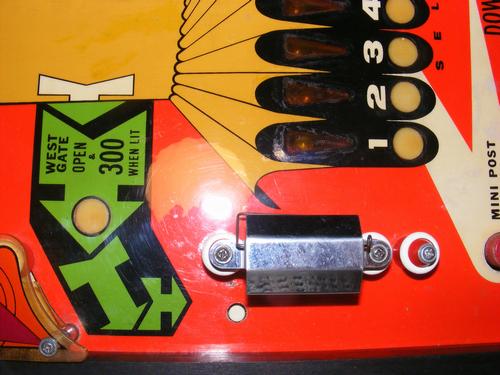
Look at those shiny big screws and score motor! The tools on the transformer are a leaf switch burnisher and a leaf switch adjuster.
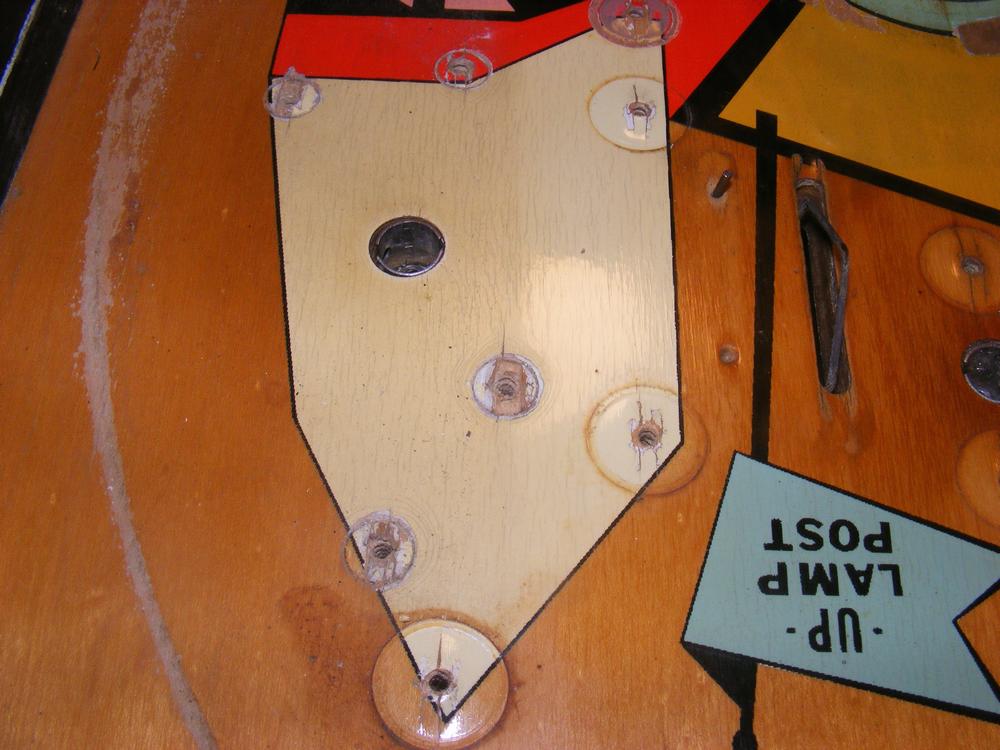
The Seventh Battle - Add Dowel Pins for Stripped Playfield Holes
If just thinking about drilling into your beloved favorite pinball playfield gives you the heebie jeebies, or you don't feel comfortable doing this in situ surgery, use the toothpick method and skip this section.
Almost every pinball machine with lots of use will develop posts that won't stay in place. These are typically the posts that get the brunt of the pinball strikes from the pinballs hit with the flippers. This method works well if the bottom of the post is bigger that 1/4 inch - this is so the post will hide the obscene dentistry you will perform on the playfield. Here's how to do it:
- Remove the screw holding down the post and then remove the post
- Insert a 7/32" drill bit into your favorite drill
- Put a piece of tape around the drill bit at the point where the drill bit is 3/4 of the width of the playfield
- Carefully drill a 7/32 inch hole where the screw hole is up to the masking tape on the drill bit
- Center the drill bit over the screw hole
- Cut a 1/4" dowel pin to fit into the depth of the hole - measure and cut carefully!
- Put a little bit of wood glue on the sides of the hole
- Pound the dowel into the hole being careful not to damage the playfield
- Drill a small hole in the center of the dowel pin. It is better to start with a small drill bit so that the screw will fully bite into the dowel pin. I used a 5/64" bit to drill the screw hole
- Center the post and screw over the screw hole
- Insert screw and screw it down until the post cannot be turned
Be very careful to drill no more than 3/4 of the way through the playfield. The playfield is thinner than you might think - I learned this one the hard way!
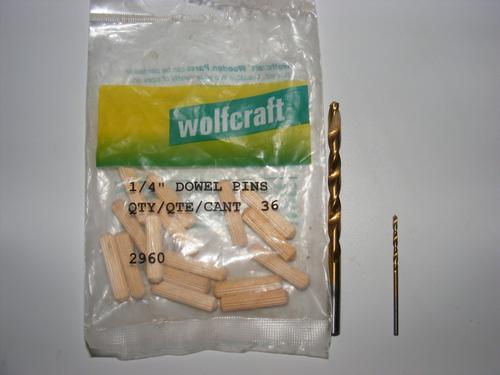
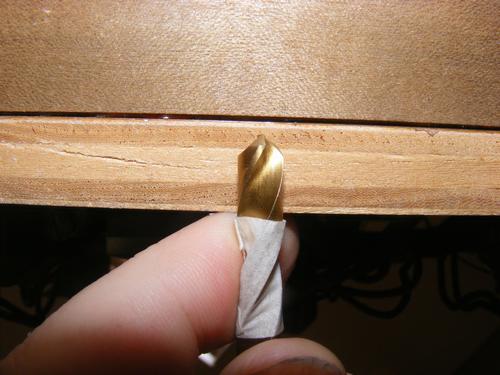
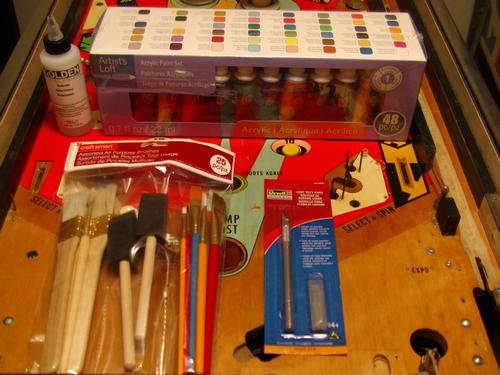
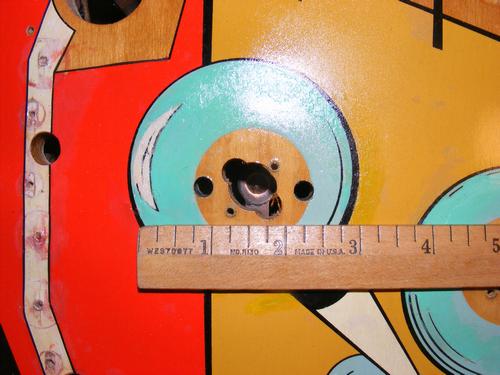
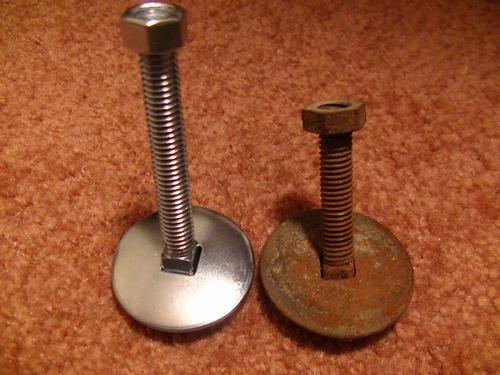
These Wolfcraft 1/4" dowel pins, a 7/32" drill bit and a 5/64" drill bit are perfect for the job.
The Eighth and Most Painful Battle - Playfield Paint Touch-up
- Trying to match playfield colors is damned difficult.
- You will make lots of mistakes trying to match playfield colors
- Acrylic paint is perfect because acrylic paint can be easily removed With 90+% isopropyl alcohol
- There is no such thing as perfect - Good must suffice
- Red and yellow require multiple coats since the pigments in these colors are low in the cheaper paints
- Blue-green and aqua colors are especially difficult often requiring the mixing of three colors
- It would have been cheaper and perhaps easier to match colors using the 50 cent bottles of acrylic paint from Walmart
- Some people say that women are better at this than men. Whether true or not, it's a great way to get the other family members bought into your "little" project
The above list explains why many playfield restoration projects are done with friskets and air brushes, essentially repainting most or all of the entire playfield. Add this to horseshoes and hand grenades for the list of things where close is good enough.
But I wanted to do the touch-up routine. Firstly, not everyone can successfully touch-up playfield paint. It requires extreme patience, concentration, time and an appreciation for detail. Fortunately, I had most of these attributes, especially time, and time can make up for boatloads of mistakes!
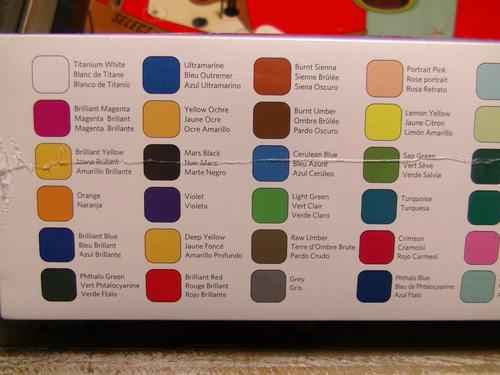
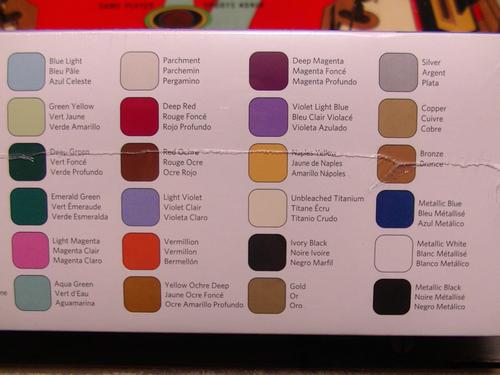
- Aqua Blue - Light Blue, Deep Yellow and White
- Yellow - Deep Yellow, Brilliant Yellow and White
- Red - Vermillion and White
- White - Parchment and White
- Black - Mars Black
- Pink - Portrait Pink
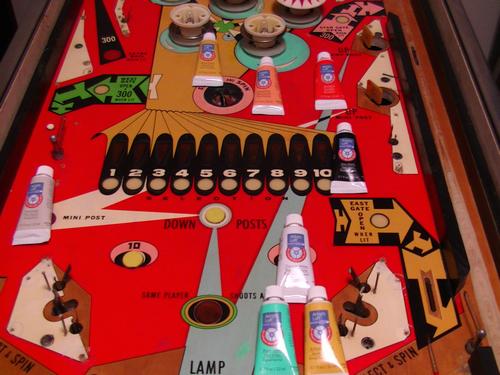
I used a large plastic can top to put the small blobs of paint ready for mixing. For everything but tiny touch-ups I added Retarder. The instructions on the Golden brand I used said not to add more than 8:1, paint to retarder. I mixed my paint to match the playfield color as closely as possible. The acrylic paint dries darker than when wet, making the process even more fun for those of us masochists out there. I applied the mixed paint directly to the playfield and waited for it to dry. When it dried, I learned what color I needed to add next, usually white. I removed the mismatched color with 91% isopropyl alcohol and went back to try again. I then added a bit of the new color to only PART of the previously mixed blob. After several iterations of this process, my blob would be spread out more in a line than in a blob. When I got the color right, or more appropriately stated, when I thought that I had finally gotten the color right, I mixed the rest of the paint to match. The aqua blue was evil, laughing at every attempt I made! I did get a match after 15, 20, more? attempts only to find out that it was too dark when naphtha was applied. Yikes!
PP WOW Pitiful Pinball Words of Wisdom #4: Applying naphtha over the acrylic paint will give you a good idea what color you will end up with after the clear coat process.
PP WOW Pitiful Pinball Words of Wisdom #5: You will know when you get the color wrong - it will stand out like a sore thumb!
Need I say that I did get it right in the end - nailed it as a matter of fact!
Finished Paint Touch-up Pics
The Ninth Battle - Leveling Playfield Inserts
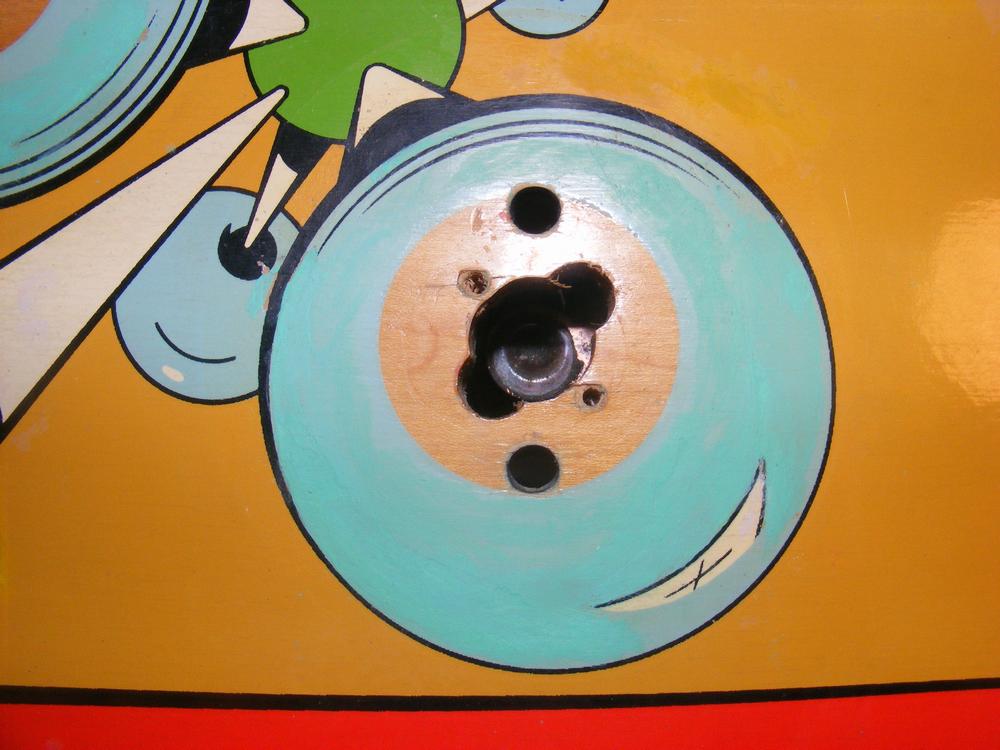
First mistake. I didn't want to buy more clear coat. I already had clear coat in a rattle can that could be used - or so I thought. I masked off an area around the yellow extra ball insert and gave the Krylon Acrylic Crystal Clear a small blast. The problem was that even a small, teeny, tiny blast was too much! The clear ended up under the masking, and because Krylon Acrylic Crystal Clear is a "hot" paint, it took part of the original ink off the playfield when I wiped up the mess! No steps forward and two steps back. I was really bummed, so much so that I wasn't going to get any sleep until I had repaired the damage. Six hours and no sleep later, I had hand painted the damaged area so that it was good enough; far from perfect, but a reminder of one of my many horrific mistakes.
Can you find the hand painted areas?
Mistake number two. It doesn't help when you buy what you think is the correct liquid clear coat in a can. I bought some Varathane Spar Urethane Clear, oil based, and brought it home to apply above the inserts. When I opened the can, it didn't look clear at all.
Mistake number three was to apply the brown paint instead of returning it. After a good nights sleep, I came to my senses, grabbed the can and receipt and headed back to the store. Fortunately, Ace was kind enough to accept the return, even though I had used a tiny bit of the 8 ounce can. I found a similar product by Varathane that was water based and called Varathane Spar Urethane UV Protection Formula Crystal Clear. It was 16 ounces and I only needed a fraction of an ounce but, hey, I felt lucky to find what I felt was, finally, the correct clear. This time we opened the can at the counter and found a milky white liquid that dried, well, crystal clear just like the label said!
I now had the right weapon in hand, but first I had to remove the old, brown urethane. Some came right off using the tip of a regular screw driver tip applied at a 90 degree angle to the playfield. I wanted to use a chisel as directed by Vid in his guide, but my chisel was too big. The urethane above the yellow triangles was much harder to remove. Mistake four - I scratched some of the original lacquer coating on some of the inserts. These had to be sanded out. More time lost.
I was finally ready to put the milky white urethane over the inserts. One mistake I avoided - I knew that the urethane had to be stirred not shaken. There's a James Bond joke there somewhere. I tried dripping it over the inserts using a Q-Tip. Not good; the cotton flaked off. I next tried the handle of a small paint brush, but this left bubbles. I finally settle on the bristles of a small paint brush. I let it drip off the bristles onto the insert and then carefully, to avoid adding bubbles, lightly brushed the urethane up to the edges of the insert. This stuff has the disgusting consistency of mucous, and no matter how hard I tried, bubbles ended up in the paint. I could remove a few by herding them to the edges of the inserts and onto the playfield and a quick clean of the playfield with a damp rag, but a few bubbles remained. These too had to be sanded out. I let the urethane dry overnight, sanded out the bubble and applied another coat of urethane. I'm not sure if this is the best method, but I applied the urethane in several thin coats, with overnight drying between coats. It actually looks quite good considering the disasters encountered along the way.
PP WOW Pitiful Pinball Words of Wisdom #6: Even the worst pinball restoration disasters can be fixed with enough time, money and the right tools. Well, usually!
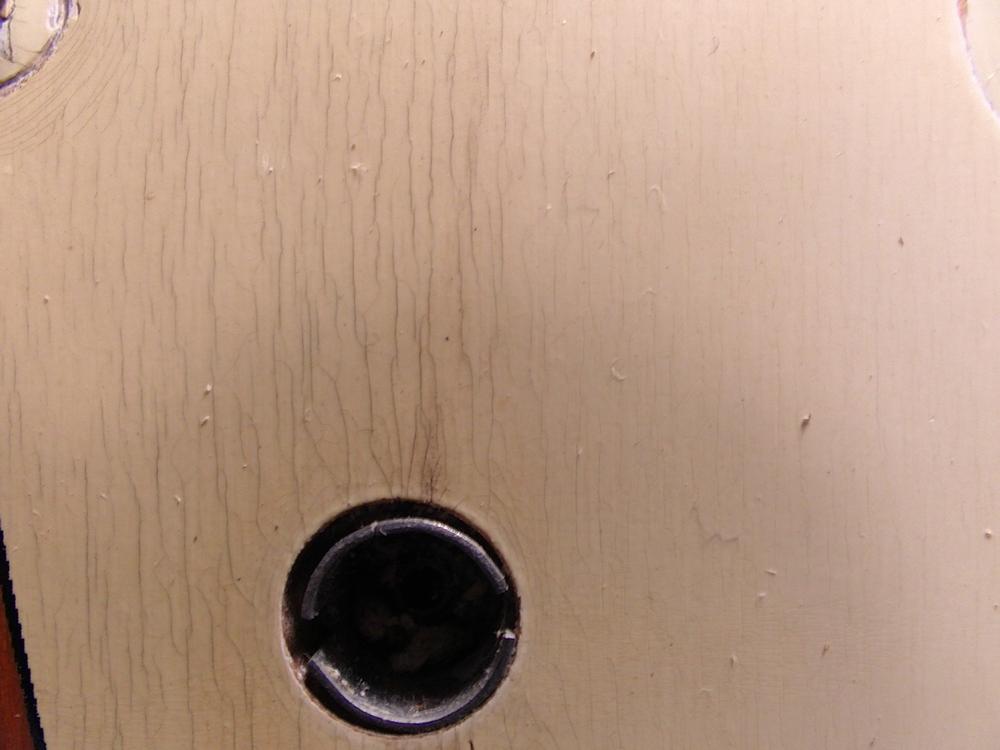
The Tenth Battle - Applying First Clear Coat
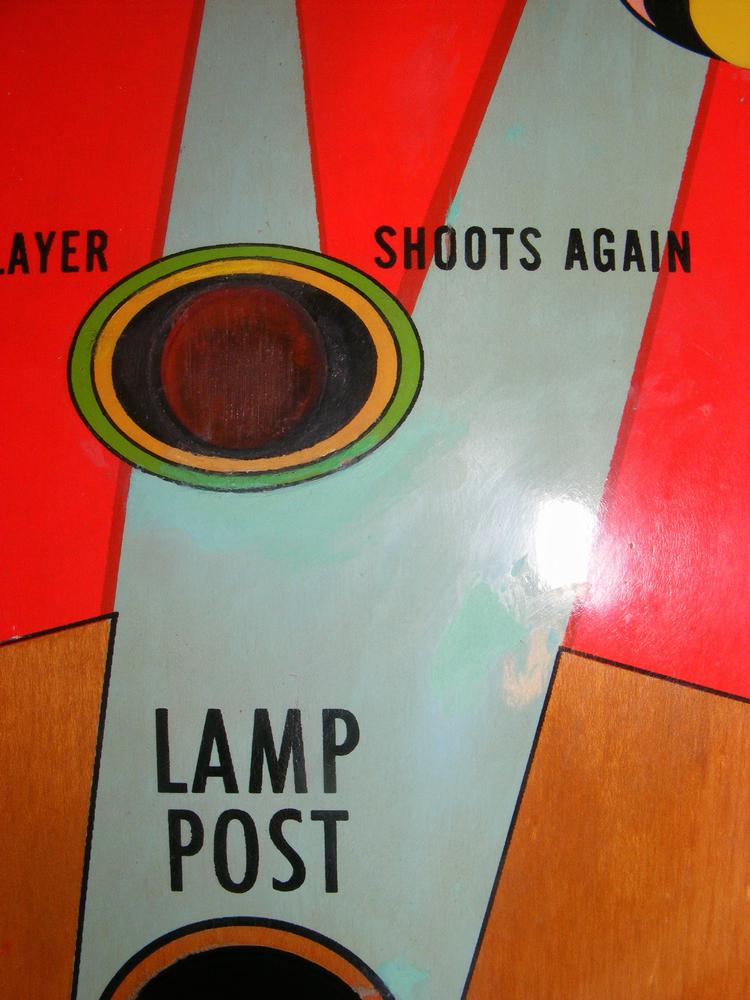
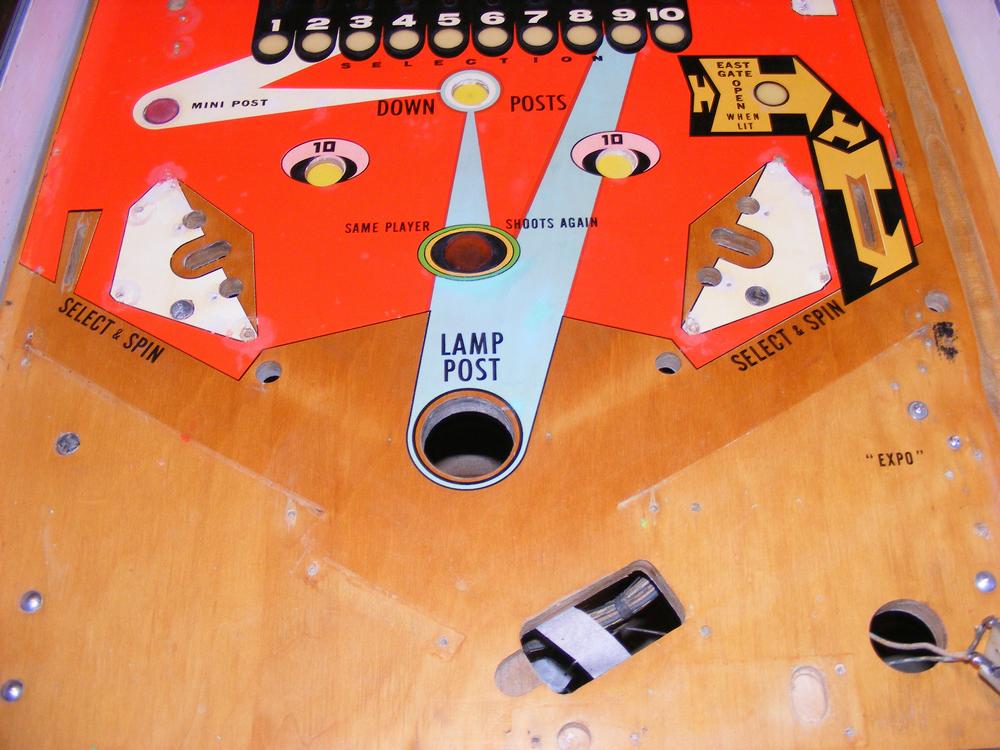
These images show the playfield clear coated once with Krylon Crystal Clear Acrylic Coating 1303. Note the masking tape in the eject hole and old #47 lamps in the lamp sockets. The first clear coat locks down all of the hard work I have done with the paint touch-up.
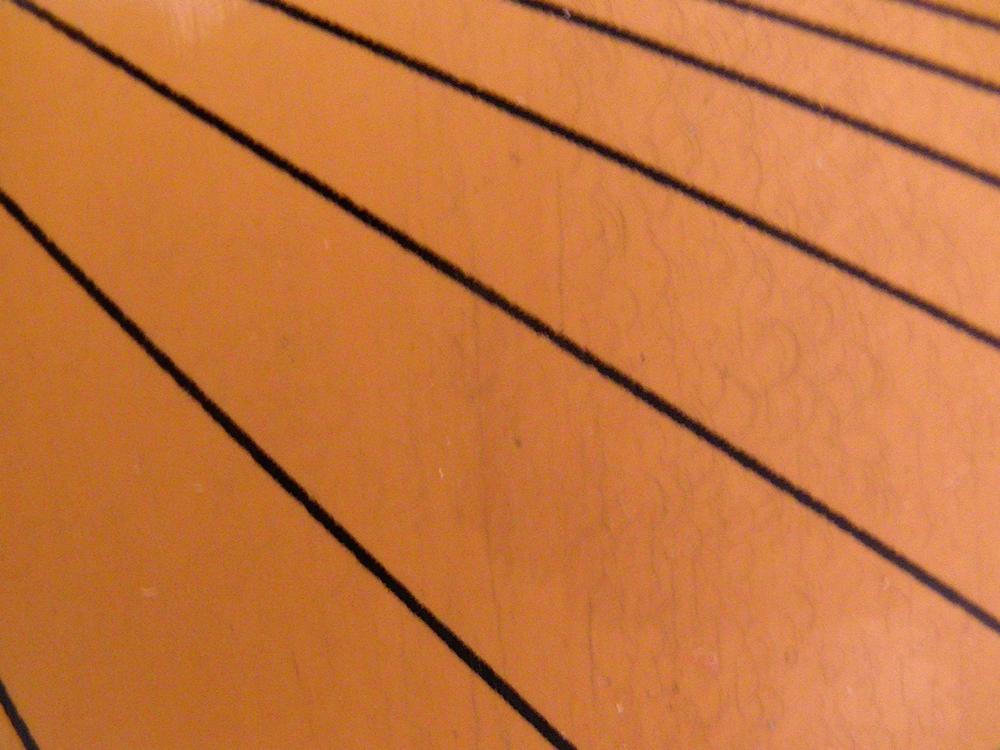
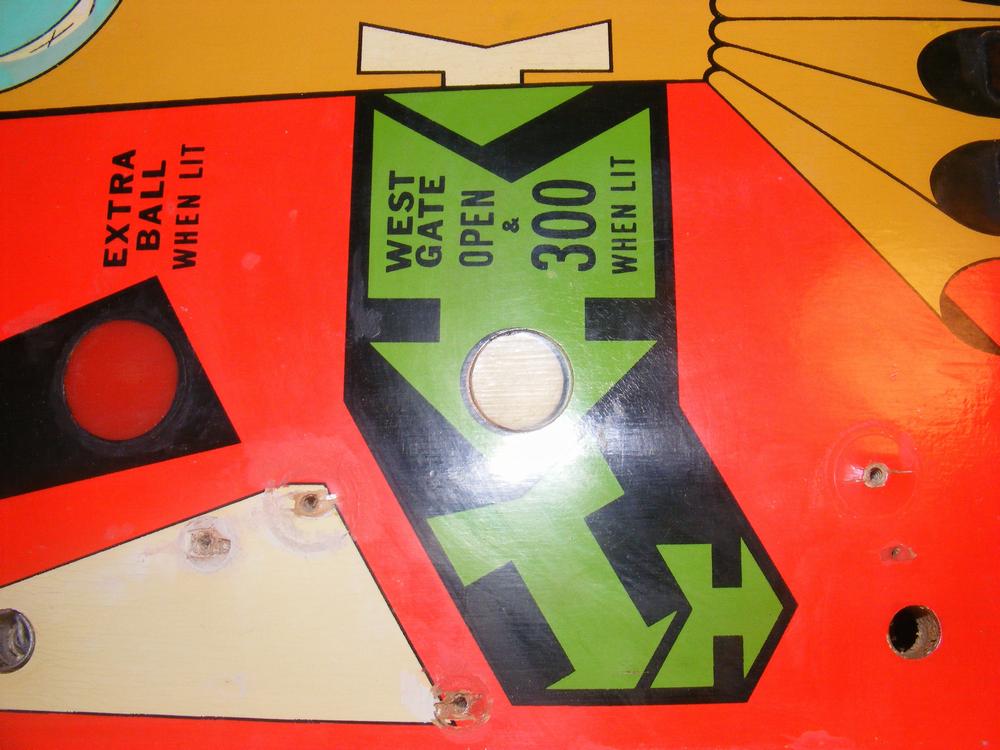
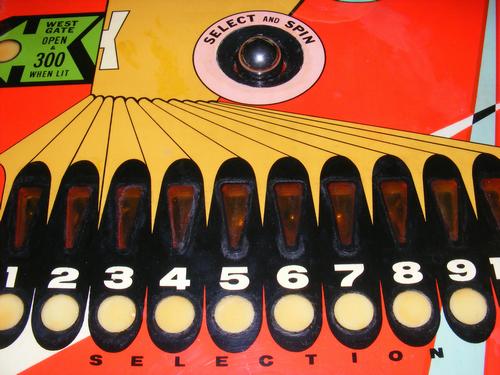
The Eleventh Battle - Applying Water Slide Decals for Key Lines and Black Lines in Circles
PP WOW Pitiful Pinball Words of Wisdom #8: Set your printer up properly. Failure to do so or if your toner fuser works at too high a temperature you can melt the decal paper and ruin the toner cartridge. I set my Canon D530 to:
- Density: +4
- Original Type: Photo
- Sharpness: +3
- Paper Settings->Paper Size: LTR
- Paper Settings->Paper Type: Transparency
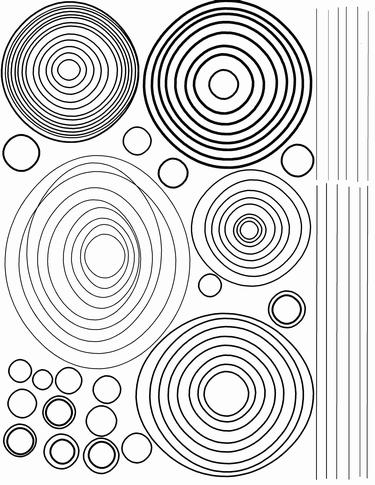
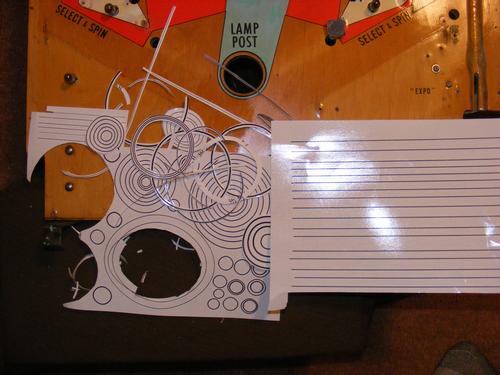
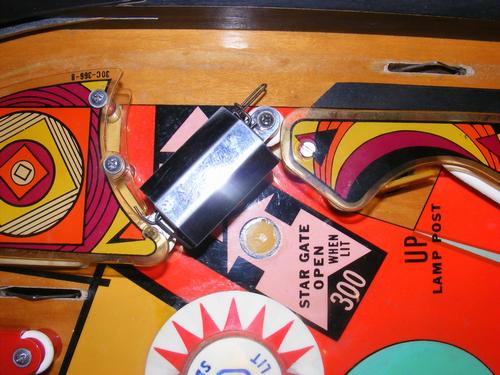
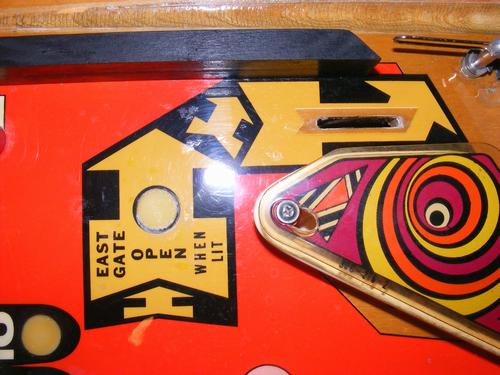
The waterslide decal paper I used was expensive, more than $1.00 per sheet, but worked like a charm with my Canon laser printer set up as described above. It can be found here at Ebay.
It took a while to get the decals properly situated with my fat fingers, but the results were much better than if I had tried to paint the partial circles by hand. One evening of work and my towers looked almost as good as new!
PP WOW Pitiful Pinball Words of Wisdom #9: Your decal circle doesn't have to be the perfect size. Decal paper has a small amount of "wiggle room" when installing narrow decals. If cutting thin lines or circle circumferences, cutting nearer to the toner on the decal will allow you to bend circles that are too big or too small to fit to size.
Take a look at the results for yourself. I am very happy that I waited and discovered this method!
Before and after pics.
The Twelfth Battle - Applying Fourth and Final Clear Coat
The Thirteenth Battle - Applying Mylar
I had several options to apply the Mylar - yeah, a pinball restore soon becomes a battle of decisions, decisions.
- Cover the entire playfield
- Cover the open playfield in one or more pieces
- Cover heavily used areas only with Mylar "patches"
I was wasting valuable thought cycles and time trying to figure out how and how much to cut the Mylar. The design of the playfield with five pop bumpers meant that most of the upper portion of the playfield would have to be covered in Mylar anyway. After discovering that it was not that uncommon to Mylar the entire playfield, I chose this method. I cut the Mylar to fit the entire playfield and taped the edges of the Mylar to the playfield so that the Mylar would stay more or less stationary. I then carefully peeled back about an inch of backing from the Mylar, beginning at the top of the playfield and pressed it into place. It is best to start in the middle and work your way toward the edges to minimize bubbles! Then I removed another inch or two and repeated the process. The process was surprising easy and the results were good considering I had not sanded the clear coat.
PP WOW Pitiful Pinball Words of Wisdom #10: It is highly recommended to install the Mylar on a perfectly flat surface. Any bumps will be telegraphed through the Mylar and any low areas will leave bubbles.
Lesson learned the hard way - sand between clear coats before applying Mylar. If you don't know how to do this, read one of the resources below.
The Fourteenth Battle - D-Day, Zero Hour
After more than two months it was finally time to turn on the machine. I hooked up all of the Jones plugs and flipped the switch under the cabinet. I then had to press the left flipper to bring the beast to life. One moment of exhilarating happiness came upon me when I realized that there were no shorts! None of the fuses had blown! This elation was soon dashed when I realized that I had installed one of the Jones plugs incorrectly. After reseating the Jones plug, and turning on the machine again, a 20A SFE fuse blew and the playfield went dark! Horrors! If you are new to EM repair, let me enlighten you as to one of the banes and curses of novice and professional pinball repairmen alike. Somewhere in that maze of wires, relays and switches there was a short. It could be as simple as one leaf tab touching its neighbor, frayed wires touching, misaligned switches or some metallic object shorting out the wiring. For starters, it was supposed to be as 15A MDL slow blow fuse!
I was lucky. I only spent three days and about five fuses finding the short. First, I verified that all the playfield switches were properly gapped and not touching. Then I went through every relay to make sure those leaf switches were properly gapped. Then I checked all of the leaf tabs to make sure that I had not inadvertently pushed one into an adjoining leaf tabs. It was a tedious but fascinating process for it was during that process that I discovered more than I bargained for. Two of the bottom wires on two different Jones Plugs in the back box had come completely loose. Two wires on the upper underside of the playfield came loose with some slight jostling. One wire one the relay bank was in the right place but missing any solder! All were resoldered. The short was hard to find. It turned out to be a small screw that was firmly wedged in between two leaf tabs on the mech panel. I have no idea how it got wedged in place so firmly, nighttime gremlins perhaps, but I was glad to find it. I even knew where it went.
I then discovered another loose wire that had to be soldered to the ball index relay. I also found another nightmare - I had a second short! This ocurred after putting the bottom apron on. I had put the solenoid on with the solder joints up. Big mistake - the apron shorted out the circuit when the outhole eject solenoid was fired. Luckily I found it without too much trouble. How did it fix it? I unscrewed the screws holding on the solenoid and rotated it 90 degrees so the solder joints were pointing toward the playfield and not up toward the apron.
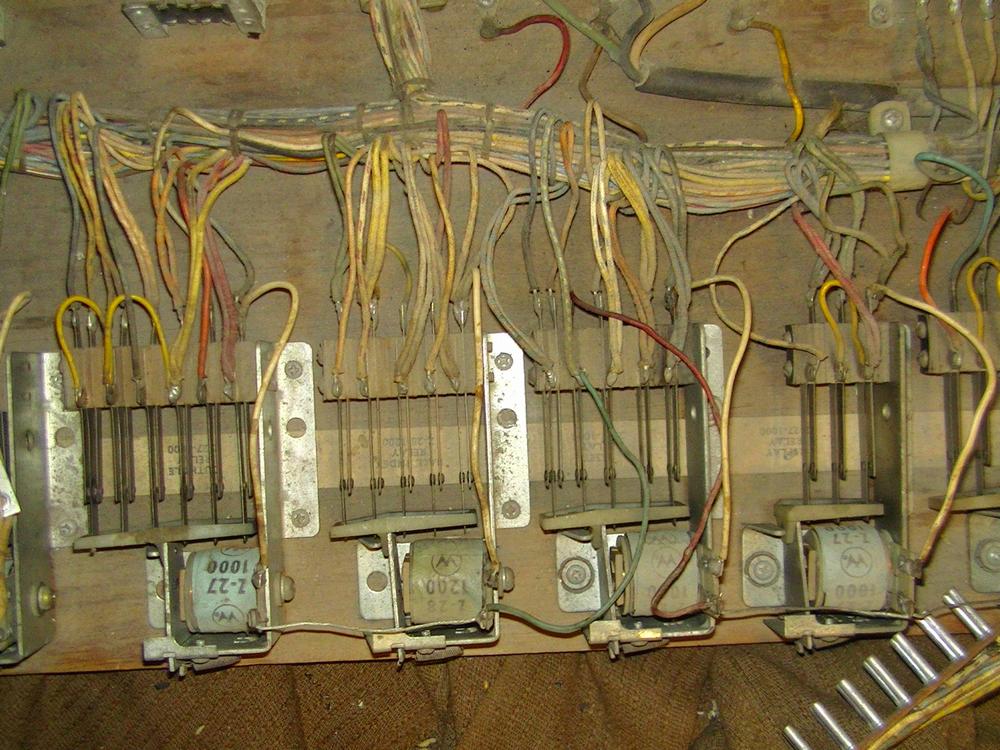
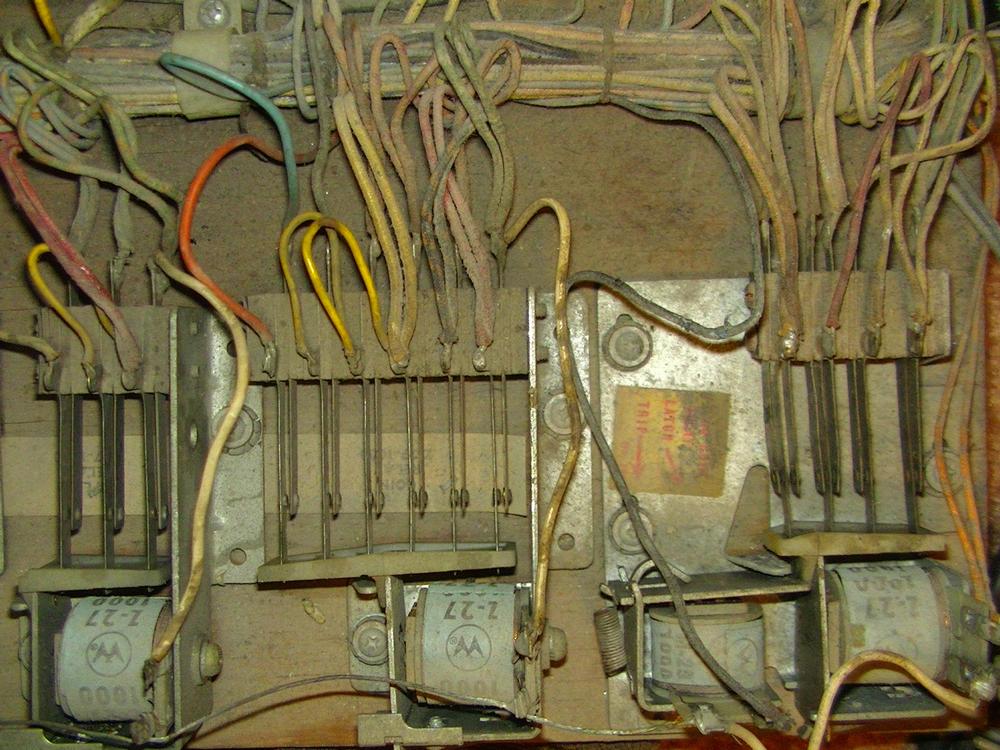
The Fifteenth Battle - Fixing the Electrical and Mechanical Components
I won't go into detail with how much fighting and tenacity it took to get Expo working properly. I had to remove, completely disassemble and clean all 10 score reels, every step unit and the two motors. After cleaning, I used Super Lube Synthetic Grease that I got at Ace Hardware for $8.99 on all of the metal gears, pivot points and vinyl contact points on these parts. The metal solenoid sleeves were replaced with vinyl ones for the pop bumpers, slings, and flippers. All other sleeves and plungers were cleaned and the plungers given a light sanding with 400 grit sandpaper to remove whatever black goop had built up on them.
PP WOW Pitiful Pinball Words of Wisdom #11: Never lubricate solenoid plungers or sleeves.
There were plenty of leaf switches to gap and burnish. Many problems quickly disappeared after make switches that didn't make were made to make and break switches that didn't break were broken into submission to properly break.
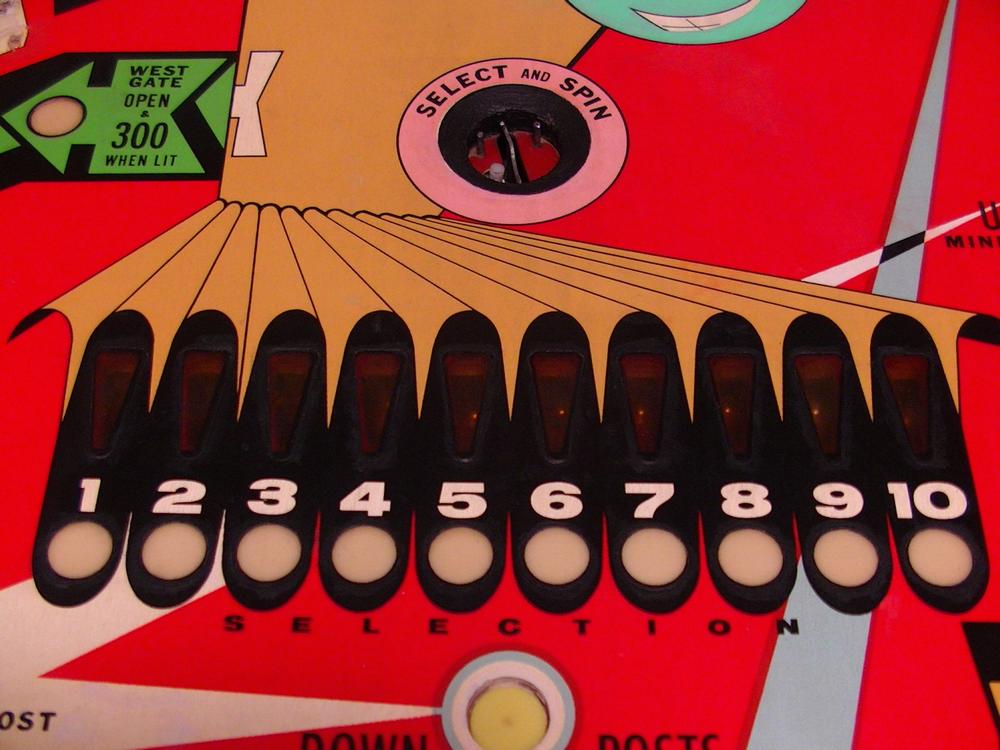
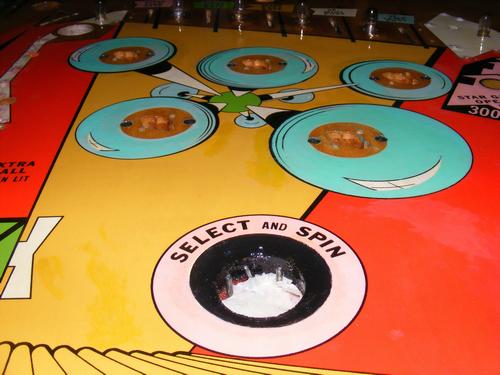
On July 5th I was down to one main problem, getting the select and spin to reward 50 points (intermittent problem) and 500 point for a lit number.
Before and After Pics
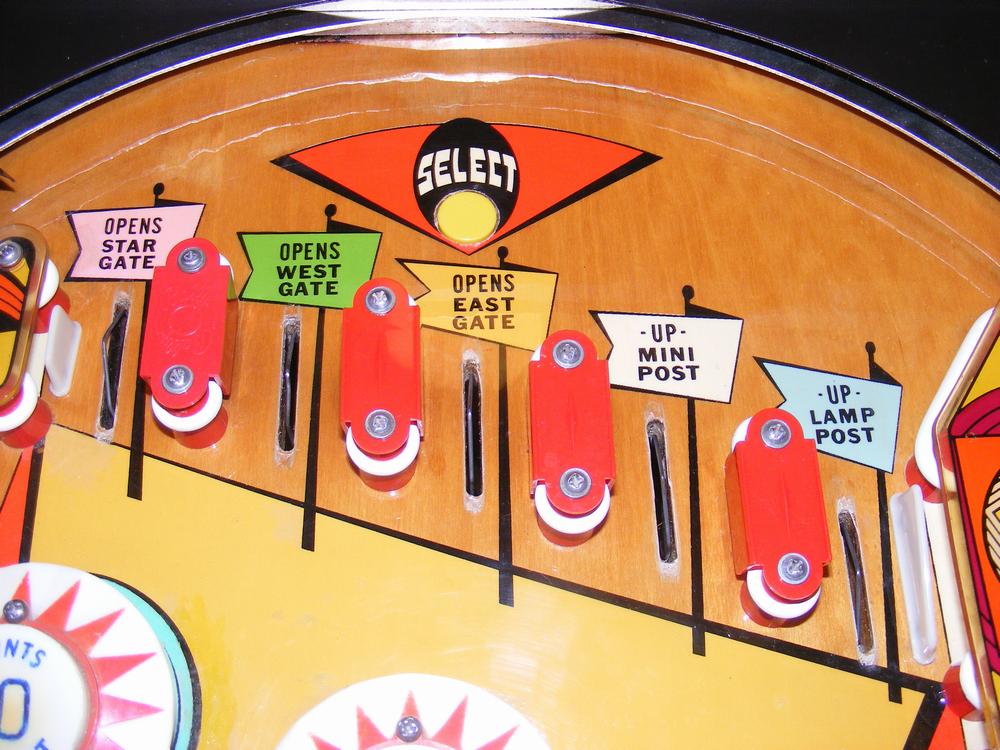
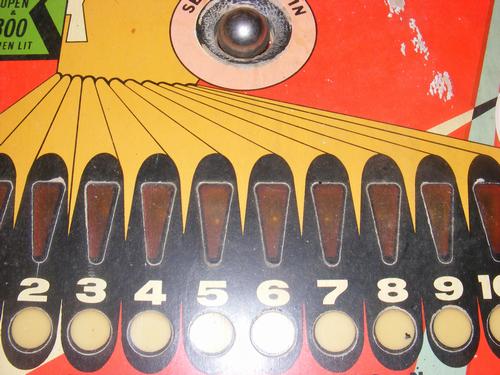
After Close-Up Pics
Before you consider whether or not you can tackle a pinball restore, you should ask yourself a few questions:
- Do I have two months or more to devote to this project?
- Do I have a work area where the work can be done?
- Do I have the patience, attention to detail, perseverance and desire to learn to accomplish the project?
- Do I have the resources, (computer, money time), to research and complete the project?
- Am I able to learn some new skills? (soldering, paint matching and touch-up, schematic reading, mechanical, electrical, etc.)
- Do I have a camera to take lots of before pics?
The last item is critical when putting Humpty Dumpty back together again.
Good luck to you if you decide to take the plunge. It is very rewarding to know that you have breathed some life into an old electro-mechanical pinball machine that was dead to the world!
Pinball Restoration Resources
Use them. Read them. Apply them!
Vid's Guide to Ultimate Playfield Restoration
Clay's Guide: Repairing Electro-Mechanical (EM) Pinball & Coin Operated Games to 1978
If you are terrified by the very thought of attempting a pinball restore after browsing through these guides, you may not be a good candidate - find a good professional who can do it for you and prepare to lighten your fat wallet considerably. You may very well have second thoughts about attempting to restore your favorite pin after reading these guides. It helps to repeat these words over and over until you change your mind: "There's no place like home." Whoops, wrong movie. Repeat these words, "I think I can. I think I can!"
See the video of my fully restored 1969 Williams Expo in action!
| Pecos SoftWareWorks Home | Contact Me | Terms of Use Rev 09/30/10 | Privacy Policy Rev 05/20/09 | About Us |
| Tweet |
|
||
|
© Copyright 2018 Alan Norton None of the content may be used or reproduced without written authorization from Alan Norton. |